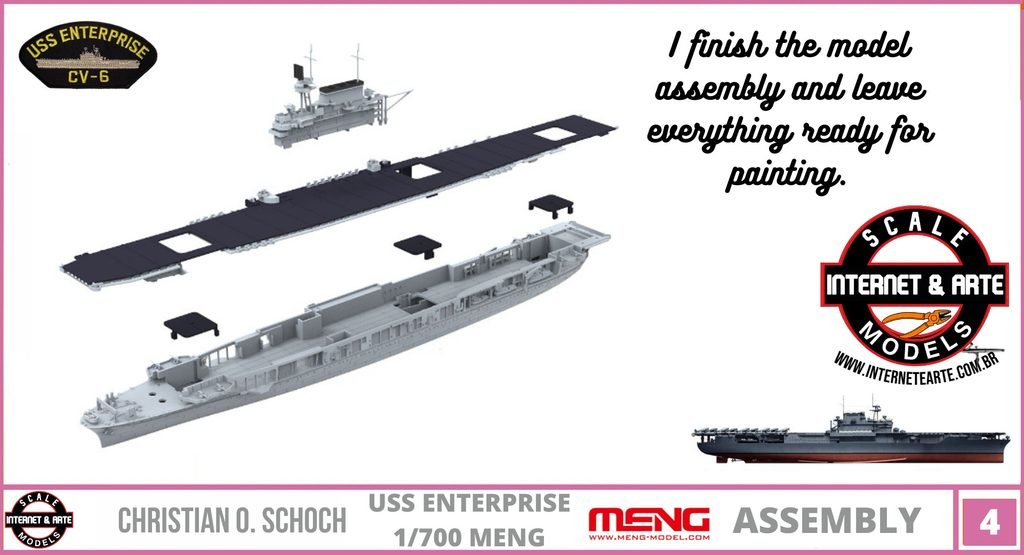
Build Log: USS Enterprise 1945 1/700 Meng – Part 4
Step 4. (Source: Personal archive/Christian O. Schoch)
Every scale modeling project reaches a moment when the focus shifts from construction to finishing. For my 1/700 scale Meng Model USS Enterprise (CV-6), that moment has finally arrived. After working through the assembly of this impressive aircraft carrier, I have completed the main construction of the kit and am now preparing for the next major stage: surface preparation, priming, and painting.
This is an important milestone in my project to represent the legendary USS Enterprise as she appeared in 1945, during the final year of the Second World War. The Enterprise was one of the most famous aircraft carriers in American naval history, and reproducing her appearance in miniature requires more than simply applying paint to a completed model. The quality of the final result depends heavily on the preparation carried out before the first color reaches the plastic.
In this fourth stage of my build, the emphasis is on the less glamorous but essential side of scale modeling: correcting imperfections, sanding surfaces, checking joints, applying primer, and researching the appropriate paints. These procedures demand patience, but they establish the foundation for a convincing historical finish.
The assembly phase may be complete, but the work required to transform the kit into a convincing miniature representation of the Enterprise is only beginning.
Completing the Meng Model USS Enterprise
The Meng Model 1/700 scale USS Enterprise, kit PS-005, provides the foundation for this project. As a representation of the Yorktown-class aircraft carrier, the kit offers an opportunity to recreate the distinctive shape and appearance of a vessel that played a major role in the Pacific War.
Completing the assembly is a satisfying achievement, particularly when working with a ship model that combines a large flight deck, a complex island structure, numerous small details, and several distinct levels of construction.
However, finishing the assembly does not automatically mean that the model is ready for painting. Even when the major components fit together well, small gaps, visible seams, uneven joints, and minor surface imperfections can remain. These defects may appear insignificant when the plastic is unpainted, but they can become much more noticeable after primer and paint have been applied.
For this reason, I am treating the transition from assembly to painting as a separate phase of the project. Before deciding that the model is ready for its final colors, I need to inspect its surfaces carefully and correct the areas that require additional work.
The goal is not to remove the character of the kit or erase the fine details that make a naval model recognizable. Instead, the objective is to achieve clean joints, consistent surfaces, and a finish that looks convincing at 1/700 scale.
Hull Preparation: The Modeling Equivalent of Bodywork
One of the most important tasks at this stage is what modelers often call bodywork or surface correction. Similar to the preparation performed on a vehicle before its body receives primer and paint, this process involves identifying imperfections and gradually correcting them until the surface is ready for finishing.
On a ship model, the work can involve checking the hull, examining the joints between assembled components, smoothing visible seams, and correcting small irregularities that would otherwise remain visible beneath the paint.
This process requires a careful approach. The hull is one of the most visually important elements of the Enterprise, and its appearance influences the overall impression of the completed model. Any obvious seam or uneven transition can distract from the shape of the vessel, especially when the model is displayed against a realistic ocean base.
Sanding is therefore essential, but it must be controlled. Removing too much material can damage molded details, soften sharp edges, or create uneven areas that are difficult to correct later. At this scale, even a small mistake can have a disproportionate visual impact.
My approach is to inspect the model under good lighting, identify the areas that need attention, and work gradually rather than attempting to correct everything in a single pass. The objective is a clean, uniform surface without sacrificing the kit’s original detail.
Particular attention must be paid to transitions between components. These areas can reveal differences in height, small gaps, or traces of adhesive. Correcting them before painting will help the finished model look more cohesive, as though the various parts belong to a single structure rather than a collection of separately assembled pieces.
Plenty of Sanding, Patience, and Attention to Detail
Sanding is one of those modeling activities that rarely receives the attention it deserves. It can be repetitive, time-consuming, and visually unrewarding because progress is often difficult to appreciate until the primer reveals the quality of the work.
Nevertheless, this is where much of the final finish is determined.
Different imperfections require different approaches. A noticeable seam may need more initial correction, while a barely visible surface irregularity requires a much lighter touch. Using progressively finer abrasives helps remove the marks left by earlier sanding and produces a smoother surface for the subsequent stages.
The most important principle is to remove material only where necessary. Raised imperfections should be reduced carefully, while recessed details, panel lines, and other molded features must remain intact.
At 1/700 scale, the relationship between surface preparation and detail preservation is especially important. The Enterprise contains numerous small features that contribute to the appearance of the flight deck, hull, island, and other structures. Excessive sanding could easily diminish details that are difficult or impossible to restore.
Dust removal is another essential part of the process. Plastic residue can collect around seams and molded details, creating problems when primer is applied. After sanding, the model must be cleaned thoroughly and allowed to dry before proceeding.
This stage also provides an opportunity to reconsider the quality of the assembly. If sanding exposes a gap or reveals that a joint requires additional correction, it is better to address the problem now than to discover it after the camouflage colors have been applied.
For me, this is one of the defining characteristics of scale modeling: the willingness to spend considerable time on details that may not be immediately visible but ultimately determine the quality of the finished work.
Primer: Revealing Imperfections Before Painting
Once the sanding and surface corrections are complete, the next major step is applying primer.
Primer serves several purposes. It provides a consistent foundation for subsequent paint layers, improves the predictability of paint coverage, and helps reveal surface defects that may be difficult to detect on bare plastic.
An apparently smooth hull can look completely different under a uniform coat of primer. Fine scratches, shallow depressions, uneven joints, and traces of adhesive may become more apparent as the surface takes on a consistent color.
This is precisely why priming should not be regarded merely as a preliminary painting step. It is also a diagnostic stage.
After the primer has dried according to the product instructions, I will inspect the model again under good lighting. If any imperfections remain, they can be corrected before the final colors are applied. Depending on the problem, this may involve localized sanding, additional surface correction, cleaning, and another light application of primer.
It is important to apply primer in controlled layers rather than attempting to cover the model with one heavy coat. Excessive paint can obscure fine details, particularly on a 1/700 scale ship where railings, deck fittings, and small structural features are already delicate.
The objective is a thin, even foundation that preserves the model’s details while providing a reliable surface for the paint system.
Patience is particularly important here. Allowing each layer to dry properly reduces the risk of disturbing the surface during subsequent work and makes it easier to evaluate the result accurately.
Researching the Right Tamiya Paints for 1945
While preparing the model’s surfaces, I am also researching the Tamiya paints that will be most appropriate for representing the USS Enterprise in 1945.
Choosing the right colors is not simply a matter of selecting shades that look attractive in the bottle. A historically convincing finish requires consideration of the ship’s operational period, the colors used by the U.S. Navy, and the visual differences between a real vessel and a model displayed under artificial lighting.
The Enterprise underwent changes in appearance throughout her wartime service. Consequently, the painting scheme must be considered in relation to the specific period being represented. Since my objective is a 1945 configuration, the research must focus on the appropriate late-war appearance rather than treating every wartime Enterprise color scheme as interchangeable.
The flight deck, vertical hull surfaces, and other exterior areas must be considered separately. Their colors served different purposes and were affected by different environmental conditions. The flight deck, for example, requires particular attention because its appearance is strongly influenced by the camouflage scheme, surface wear, and the contrast between painted areas and operational markings.
My preference is to work with Tamiya paints, so the challenge is to identify suitable colors within that range and determine which shades can be used directly and which might require carefully controlled mixing.
Color references, historical photographs, reliable modeling references, and the instructions supplied with the kit can all contribute to the research. However, photographs must be interpreted carefully. Lighting, film characteristics, weathering, and the age of the image can significantly alter the apparent color of a ship’s surfaces.
For that reason, I do not want to select a color solely because it appears correct in a single photograph. Instead, I am looking for a combination of historical evidence and practical painting considerations that will produce a credible representation of the Enterprise in miniature.
Tamiya Paints and the Importance of Scale Effect
One challenge in painting a 1/700 scale ship is that colors that look convincing on a full-size vessel do not always produce the same visual effect on a miniature.
The model is viewed from a much shorter distance, but the viewer’s eye interprets its colors, shadows, and surface details differently. Dark colors can appear particularly heavy, while subtle differences between neighboring shades may become difficult to distinguish.
This is where the concept of scale effect becomes useful.
Scale effect does not mean that historical colors should be changed arbitrarily. Rather, it involves considering how color, contrast, and weathering behave visually at a reduced scale. A carefully selected finish can preserve the character of the historical scheme while ensuring that the model’s details remain readable.
Tamiya’s range offers a practical starting point for this process. Nevertheless, the final selection must be based on the intended historical appearance, the properties of the individual paints, and tests performed before committing to the entire model.
Whenever possible, testing candidate colors on a separate plastic surface or spare piece allows me to evaluate coverage, tonal balance, and the appearance of the paint after drying.
It is also important to consider the compatibility of the primer and subsequent paint layers. Following the manufacturer’s instructions for application, thinning, and drying helps avoid problems that could compromise the finish.
The objective is not to make the Enterprise look artificially new or excessively weathered. It is to create a balanced finish that communicates the appearance of an operational American aircraft carrier during the final year of the Pacific War.
Preparing for the Painting Stage
With the assembly complete, the model is entering a phase in which careful planning becomes just as important as manual skill.
Before applying the final colors, I need to ensure that the surfaces are clean, the seams are properly corrected, the primer has revealed no significant defects, and the selected Tamiya paints are suitable for the intended scheme.
The sequence of painting operations also deserves consideration. Certain areas may be easier to paint before other components receive their final colors. The island, flight deck, hull, and smaller details all present different challenges, and an organized approach can reduce unnecessary handling and the risk of damaging finished surfaces.
Masking may also be required to maintain clean boundaries between different colors. On a model as detailed as the Enterprise, careful masking and controlled paint application are essential for maintaining sharp transitions without covering small structural features.
I want the painting stage to build upon the work already completed rather than conceal problems that should have been corrected earlier. That is why the sanding, inspection, and priming stages are receiving so much attention.
The more thoroughly these preparations are carried out, the greater the opportunity to achieve a convincing final result.
Looking Ahead: Bringing the Enterprise to Life
Completing the assembly of the Meng Model USS Enterprise is an important milestone, but it is only one part of a much larger project.
The next stage will transform the assembled plastic into a recognizable representation of the carrier as she appeared in 1945. Through careful surface preparation, repeated sanding where necessary, primer inspection, and thoughtful Tamiya paint selection, I hope to establish a finish that respects both the historical subject and the craftsmanship of the model.
This process also reinforces an important lesson for anyone interested in scale modeling: a successful paint job begins long before the airbrush is used.
The time invested in correcting seams, smoothing surfaces, preserving details, and evaluating the primer may seem excessive, but these are the steps that separate a merely assembled kit from a carefully finished miniature.
For now, the construction phase is complete, and the Enterprise is ready to move toward the next challenge. The sanding and surface preparation will continue wherever necessary, the primer will help reveal any remaining imperfections, and the research into suitable Tamiya colors will guide the final painting decisions.
The ultimate goal is to capture the character of one of the U.S. Navy’s most celebrated aircraft carriers during the closing months of the Second World War.
With patience, careful preparation, and a historically informed approach to color, the USS Enterprise will gradually move from an assembled model to a finished tribute to an extraordinary warship and the sailors and aviators who served aboard her.
The assembly is finished. Now the real work of preparing the surface, selecting the colors, and bringing the USS Enterprise of 1945 to life begins.
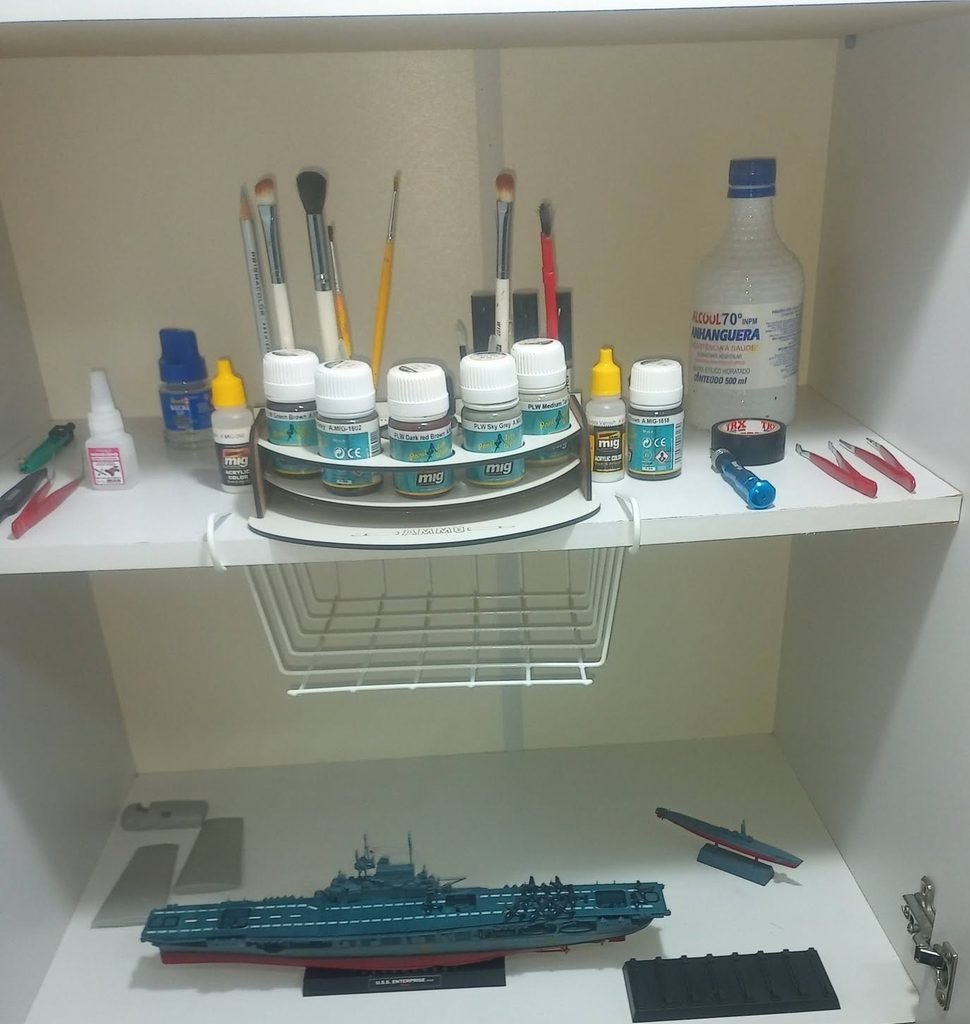
The modeling workbench (Source: Personal archive/Christian O. Schoch)
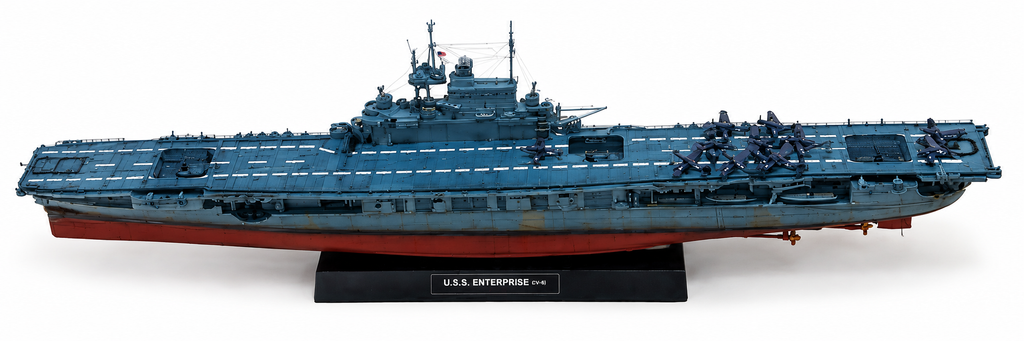
Finished scale model. (Source: Personal archive/Christian O. Schoch)
READ MORE:
- Build Log: USS Enterprise 1945 1/700 Meng – Part 1
- Build Log: USS Enterprise 1945 1/700 Meng – Part 2
- Build Log: USS Enterprise 1945 1/700 Meng – Part 3
- Build Log: USS Enterprise 1945 1/700 Meng – Part 4
- Build Log: USS Enterprise 1945 1/700 Meng – Part 5
- Build Log: USS Enterprise 1945 1/700 Meng – Part 6
- Build Log: USS Enterprise 1945 1/700 Meng – Part 7
- Build Log: USS Enterprise 1945 1/700 Meng – Part 8
- Build Log: USS Enterprise 1945 1/700 Meng – Part 9
- Build Log: USS Enterprise 1945 1/700 Meng – Part 10
- Build Log: USS Enterprise 1945 1/700 Meng – Part 11
- Build Log: USS Enterprise 1945 1/700 Meng – Part 12
- Build Log: USS Enterprise 1945 1/700 Meng – Part 13
- Build Log: USS Enterprise 1945 1/700 Meng – Part 14
- Build Log: USS Enterprise 1945 1/700 Meng – Part 15
Thank you to all of my patrons on Patreon for your monthly support of my work. I truly appreciate it.
Patrons receive a printed copy of my book Zero Fighter Historical Society, delivered straight to your home at no additional cost.
*(Please note: this offer is not available in all countries)
Become a patron at www.patreon.com/ZeroSociety
