Build Log: USS Enterprise 1945 1/700 Meng – Part 12
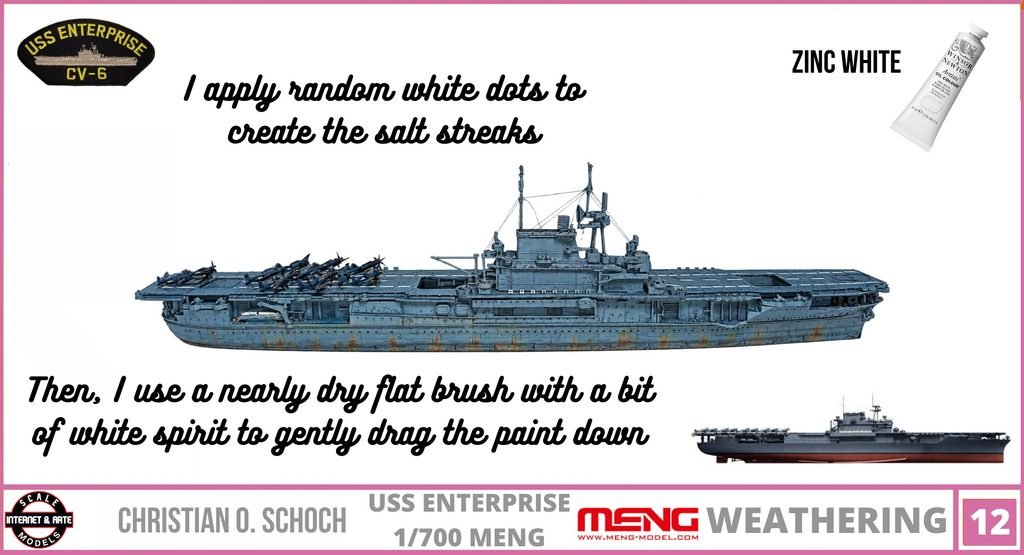
Step 12. (Source: Personal archive/Christian O. Schoch)
Introduction: Bringing the Sea’s Influence to Your Model
One of the most rewarding aspects of building a scale model warship is the opportunity to recreate the subtle effects of a vessel’s life at sea. Beyond accurate construction, historically appropriate colors, and carefully applied markings, weathering gives a model the visual depth and character that distinguish a simple miniature from a convincing representation of a real ship.
In my 1/700 scale model of the USS Enterprise (CV-6), representing the aircraft carrier in 1945, I use oil paints to reproduce some of the environmental effects that accumulate on a ship during prolonged operations at sea. Among these effects, salt streaks are particularly interesting because they introduce irregular patterns, delicate tonal variations, and a convincing sense of exposure to the marine environment.
For this stage of the project, I use Zinc White oil paint. My technique is straightforward: I apply random white dots to selected areas of the model and then use a nearly dry flat brush, slightly moistened with white spirit, to gently drag the paint downward. This controlled movement transforms isolated dots into subtle streaks that suggest the traces left by salt deposits, moisture, and repeated exposure to seawater.
The objective is not to cover the model in white paint. Instead, I want to create restrained, irregular marks that complement the existing finish and contribute to a more authentic appearance.
Understanding Salt Streaks on Naval Vessels
Ships operating in the open ocean are continuously exposed to wind, spray, humidity, and saltwater. When seawater reaches a surface and subsequently evaporates, it can leave mineral residues behind. Repeated wetting and drying, together with rainwater runoff and the movement of moisture across painted surfaces, can produce a variety of visible streaks and deposits.
On a real aircraft carrier, these effects vary according to the location of the surface, the direction of water movement, the vessel’s operational conditions, and the maintenance it receives. Vertical bulkheads, exterior hull plating, structural supports, and exposed fittings can all display different patterns of weathering.
It is important, however, to distinguish between actual salt deposits and the broader appearance of environmental streaking. Salt itself does not always produce long, conspicuous white lines. Many streaks result from a combination of moisture, dissolved contaminants, oxidation, and accumulated grime. Therefore, on a scale model, white streaks should be understood as a visual interpretation of salt exposure and marine weathering rather than a literal representation of every deposit found on a full-size vessel.
This distinction is particularly important when modeling the USS Enterprise during the final year of World War II. The carrier operated in demanding Pacific conditions, where sun, rain, seawater, and intensive naval operations influenced the appearance of exposed surfaces.
By introducing carefully controlled streaks, I can suggest this environment without making the model appear neglected or excessively weathered.
Why I Choose Zinc White Oil Paint
For this stage of the weathering process, I use Zinc White oil paint.
White oil paint offers several advantages for this particular technique. Its relatively slow drying time allows the modeller to manipulate the pigment after application, making it possible to create elongated marks, soften their edges, and adjust their intensity before the paint becomes difficult to work.
Unlike a permanent painted line, an oil streak can be modified with a clean brush and a small amount of suitable thinner. This flexibility is especially useful in 1/700 scale modeling, where even a small amount of pigment can have a considerable visual impact.
Zinc White is generally associated with a more transparent appearance than Titanium White, depending on the formulation and pigment concentration. This characteristic can be useful when creating delicate weathering effects that need to remain integrated with the underlying paintwork.
Nevertheless, the behavior of oil paints varies between manufacturers and formulations. Zinc White should not automatically be assumed to be transparent in every product, and its suitability depends on the desired effect.
For my USS Enterprise, the intention is to avoid an opaque white finish. I want the underlying colors to remain visible through the weathering, allowing the streaks to look like part of the ship’s surface rather than newly painted decorative lines.
The paint is therefore applied sparingly, with the final appearance determined as much by the brushing technique as by the color itself.
Preparing the Surface Before Applying Salt Streaks
Before beginning this stage, I make sure that the preceding weathering layers are sufficiently dry and that the surface is suitable for further manipulation.
Oil paints and white spirit can interact with certain varnishes, paints, and decals. For this reason, testing the combination on a spare piece of plastic or an inconspicuous area is a sensible precaution, particularly when working with older or discontinued varnishes.
A stable surface helps prevent accidental damage while the brush moves across the model.
I also consider the existing weathering. Previous applications of blue, sepia, and ochre oil paints have already introduced tonal variation to the model. The white streaks need to complement these effects rather than compete with them.
On a dark blue surface, a strong white mark can become immediately noticeable. This contrast is useful when applied carefully, but excessive white paint can make the model look artificial.
My preparation is therefore simple: I identify the areas where downward streaks would look convincing, prepare a small quantity of Zinc White, and keep a flat brush and white spirit within reach.
The brush should be clean, soft enough to avoid scratching the finish, and capable of producing controlled, narrow movements.
Step 1: Applying Random Dots of Zinc White
The first stage consists of placing small, irregular dots of Zinc White on selected areas of the model.
Rather than drawing long white lines immediately, I begin with individual dots. These marks serve as the starting points for the streaks that will emerge during the next stage.
The placement should appear random, but it is not entirely arbitrary. I vary the spacing, size, and distribution of the dots to avoid repetitive patterns. Some areas receive only a few tiny marks, while others may benefit from a slightly denser arrangement.
This variation is essential for creating a natural appearance.
Uniformly spaced dots would look artificial, while large quantities of white paint could obscure the carefully painted blue surfaces beneath them. A restrained application gives me greater control over the final effect.
At this point, the dots do not need to resemble finished salt streaks. Their purpose is to provide small amounts of pigment that can be stretched and softened with the brush.
I pay particular attention to the scale of each mark. In 1/700 scale, the apparent width of a streak must remain modest. A mark that looks delicate when viewed from a distance may become disproportionately large under magnification or in a close-up photograph.
For this reason, I prefer to begin with less paint than I think I need. Additional marks can always be introduced later, whereas excessive white pigment can be difficult to remove without disturbing the surrounding weathering.
Step 2: Dragging the Paint Downward
Once the white dots are in place, I take a flat brush and remove most of the moisture and excess product from its bristles.
The brush should be nearly dry. I then use a small amount of white spirit to help manipulate the oil paint, taking care not to saturate the bristles.
This balance is important. Too much solvent can dissolve and spread the pigment excessively, creating broad, cloudy areas instead of controlled streaks. A brush that is too dry, on the other hand, may not move the paint smoothly enough to produce the desired effect.
I gently drag the brush downward through each dot, following the direction in which water might naturally run across a vertical surface.
As the pigment moves, the original dot develops into an elongated mark. Some of the paint remains near its starting point, while a smaller amount extends downward, creating a variation in intensity along the streak.
This uneven distribution is what makes the technique effective.
I avoid applying excessive pressure. A light touch allows the brush to stretch the pigment without creating an overly uniform line. I also vary the length and direction of individual movements where appropriate, taking into account the geometry of the surface.
The goal is to produce several different types of marks: some barely visible, others slightly longer, and a few with more pronounced contrast.
I periodically clean the brush and remove excess liquid before continuing. Otherwise, accumulated pigment can cause the brush to deposit paint where I do not want it.
Step 3: Controlling the Intensity of the Effect
The quality of this technique depends on restraint.
After the first downward movements, I inspect the surface and evaluate the contrast between the white streaks and the underlying blue paint. If the marks are too strong, I use a clean brush, lightly moistened with white spirit, to soften them further.
This process should be gradual. It is better to reduce the intensity in several light passes than to remove too much paint in a single movement.
Some streaks may almost disappear during blending, leaving only a faint variation in tone. Others can remain more visible, especially in areas where I want to emphasize the effects of moisture and environmental exposure.
This contrast between subtle and noticeable marks creates a more convincing result than treating every streak identically.
I also pay attention to the relationship between the new white streaks and the earlier oil weathering. The sepia and ochre tones contribute warmth and suggest accumulated grime, while the blue shading introduces tonal variation into the painted surfaces.
Zinc White adds another dimension to this combination. When used sparingly, it helps break up the uniformity of the finish and creates additional visual interest.
The different weathering colors should work together as a coherent surface treatment rather than appear as separate, unrelated effects.
Common Mistakes to Avoid
Although the technique is simple, several mistakes can reduce its effectiveness.
Applying too much white paint: Large dots can create thick, conspicuous streaks. Starting with small quantities provides greater control.
Using an excessively wet brush: Too much white spirit can spread the pigment over a wide area and weaken the definition of individual streaks.
Creating identical lines: Repeated streaks of the same length, width, and intensity produce an artificial pattern. Variation is essential.
Dragging the paint in the wrong direction: Vertical streaks should generally follow gravity and the shape of the surface. The direction should also make sense in relation to the modeled structure.
Ignoring the underlying finish: White streaks should complement the base colors and earlier weathering layers, not overwhelm them.
Working over an unstable coating: If the underlying paint or varnish is vulnerable to white spirit, brushing can damage the finish. Testing materials beforehand helps prevent this problem.
Finally, it is worth remembering that a 1/700 model does not need every weathering effect to be immediately visible from close range. Subtle marks often produce the most convincing overall appearance when the model is viewed at a normal display distance.
Conclusion: Subtle Weathering Creates a More Convincing Warship
Applying random dots of Zinc White and gently dragging the pigment downward with a nearly dry flat brush is an effective way to introduce salt streaks and marine weathering to a scale model warship.
For my 1/700 USS Enterprise (CV-6), this technique adds another layer of visual complexity to the painted surfaces. The small white marks break up the uniformity of the blue finish, while their irregular shapes suggest the influence of seawater, moisture, and the demanding conditions experienced by a wartime aircraft carrier.
The most important part of the process is not the amount of paint used, but the control exercised during application. Small dots, minimal solvent, gentle downward movements, and careful blending allow me to create streaks with different lengths and intensities.
Zinc White is particularly useful when the intention is to introduce pale weathering without necessarily covering the underlying colors with an opaque white layer. Its final appearance will depend on the specific formulation, the quantity applied, and the surface beneath it.
As with other oil-weathering techniques, patience and observation are more valuable than speed. I prefer to build the effect gradually, evaluating each area before adding more pigment.
The result is a finish that feels less uniform and more connected to the maritime environment in which the real vessel operated.
For scale modelers interested in improving their naval weathering techniques, this method is worth experimenting with. With a small quantity of oil paint, a suitable flat brush, and a little white spirit, it is possible to create convincing streaking effects while preserving the details and colors that make a carefully built model stand out.
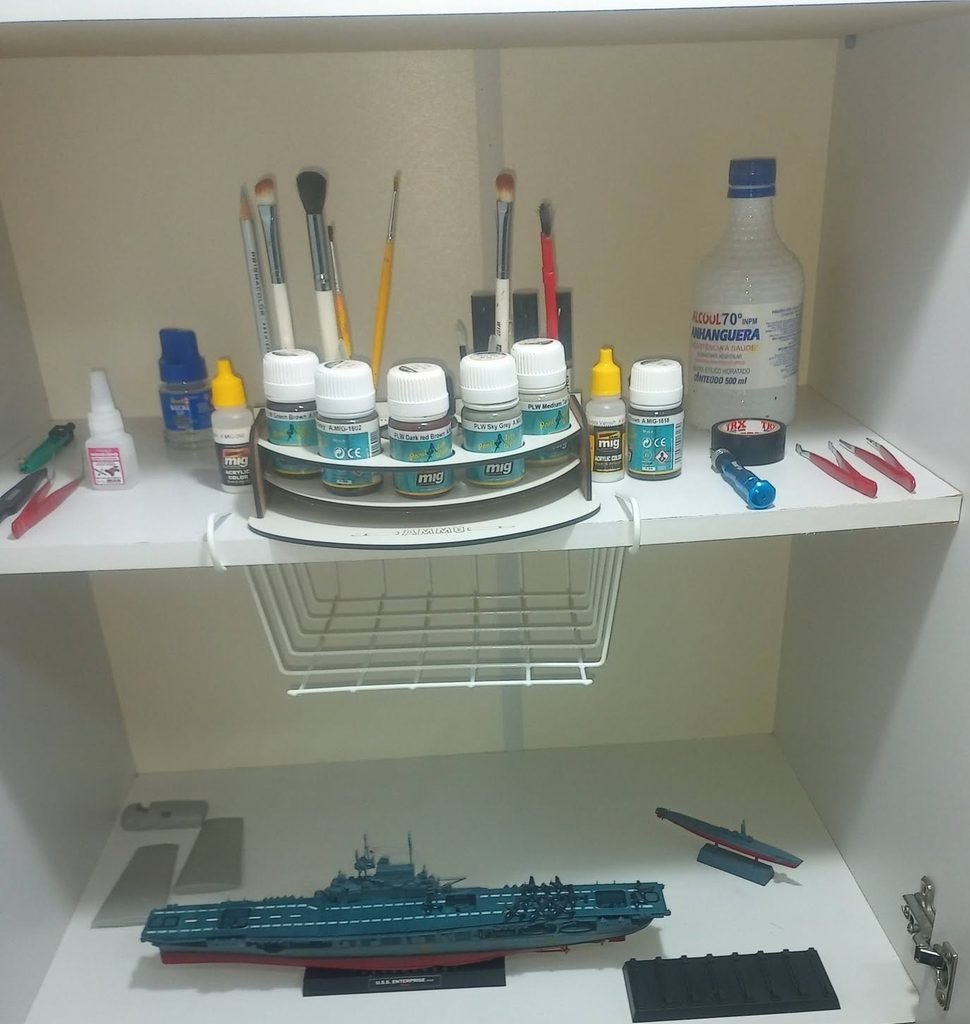
The modeling workbench (Source: Personal archive/Christian O. Schoch)
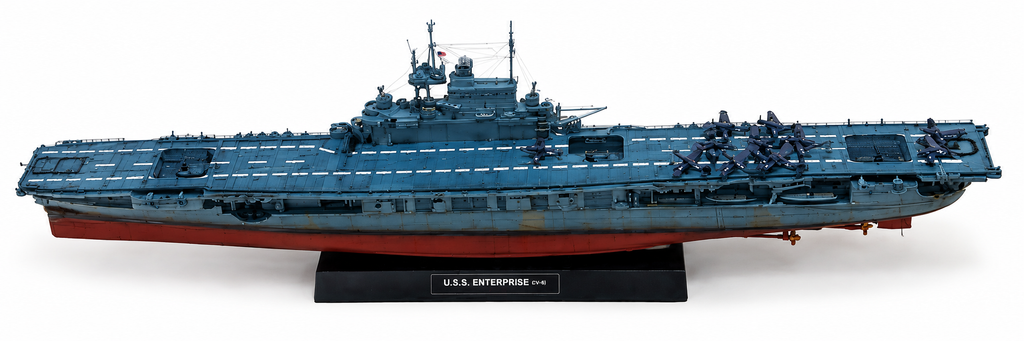
Finished scale model. (Source: Personal archive/Christian O. Schoch)
READ MORE:
- Build Log: USS Enterprise 1945 1/700 Meng – Part 1
- Build Log: USS Enterprise 1945 1/700 Meng – Part 2
- Build Log: USS Enterprise 1945 1/700 Meng – Part 3
- Build Log: USS Enterprise 1945 1/700 Meng – Part 4
- Build Log: USS Enterprise 1945 1/700 Meng – Part 5
- Build Log: USS Enterprise 1945 1/700 Meng – Part 6
- Build Log: USS Enterprise 1945 1/700 Meng – Part 7
- Build Log: USS Enterprise 1945 1/700 Meng – Part 8
- Build Log: USS Enterprise 1945 1/700 Meng – Part 9
- Build Log: USS Enterprise 1945 1/700 Meng – Part 10
- Build Log: USS Enterprise 1945 1/700 Meng – Part 11
- Build Log: USS Enterprise 1945 1/700 Meng – Part 12
- Build Log: USS Enterprise 1945 1/700 Meng – Part 13
- Build Log: USS Enterprise 1945 1/700 Meng – Part 14
- Build Log: USS Enterprise 1945 1/700 Meng – Part 15
Thank you to all of my patrons on Patreon for your monthly support of my work. I truly appreciate it.
Patrons receive a printed copy of my book Zero Fighter Historical Society, delivered straight to your home at no additional cost.
*(Please note: this offer is not available in all countries)
Become a patron at www.patreon.com/ZeroSociety
