Build Log: USS Enterprise 1945 1/700 Meng – Part 5
Step 5. (Source: Personal archive/Christian O. Schoch)
1. From Surface Preparation to the First Coat of Paint
Every scale modeling project reaches a moment when preparation gives way to color. After completing the assembly and spending considerable time refining the surface of the Meng Model 1/700 scale USS Enterprise (CV-6), kit PS-005, I finally reached this important stage: applying the first coat of paint to my miniature representation of one of the most famous aircraft carriers of the Second World War.
This step represents much more than simply covering the plastic with color. It is the beginning of the visual transformation that will gradually turn an assembled model into a convincing representation of a historic warship. At this stage, the quality of the surface preparation, the consistency of the paint, and the behavior of the airbrush all become immediately apparent.
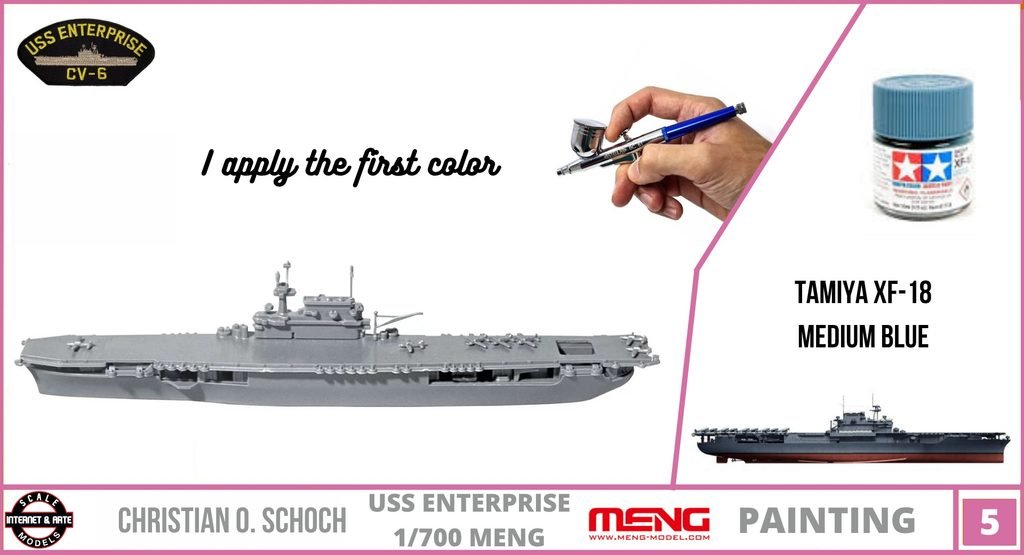
For this initial painting session, I selected Tamiya XF-18 Medium Blue, a color that I had chosen for the project’s planned paint scheme. Applying the first coat allowed me to evaluate how the paint behaved on the prepared surfaces and how well my equipment could handle the task.
My setup is far from professional. I work with a generic, Chinese-made airbrush and a small tabletop mini-compressor. Both can be difficult to operate consistently, and neither offers the convenience or refinement of more sophisticated equipment. Nevertheless, they work, and with patience, careful adjustments, and realistic expectations, they make it possible to carry out the painting stages of a detailed scale modeling project.
This is an important part of my approach to the hobby: making the most of the tools available and concentrating on the quality of the work rather than assuming that excellent results require expensive equipment.
2. Why I Chose Tamiya XF-18 Medium Blue
Paint selection is an essential part of building a historically inspired scale model. Even when the assembly is accurate, an unsuitable color can significantly affect the final appearance of the miniature.
Tamiya XF-18 Medium Blue was my choice for the first coat in this stage of the project. It is a versatile blue from Tamiya’s XF flat acrylic paint range, widely used by scale modelers working on military vehicles, aircraft, and other subjects requiring carefully controlled color application.
For a project representing the USS Enterprise in 1945, however, it is important to distinguish between the color selected for a particular modeling stage and the complete historical paint scheme of the original ship. U.S. Navy camouflage colors varied according to the applicable camouflage measure, operational requirements, and period. A paint selection should therefore be evaluated in the context of the intended scheme rather than treated as proof of historical accuracy on its own.
My objective at this point was to establish the first layer of color and assess how it would interact with the prepared plastic surface. The final appearance would depend on subsequent work, including additional colors, masking, details, weathering, and the visual relationship between the ship and the ocean base planned for the completed display.
Tamiya paints are popular among modelers because they generally airbrush well when properly prepared. Their behavior nevertheless depends on several factors, including thinning, air pressure, nozzle condition, distance from the surface, and environmental conditions.
With an inexpensive airbrush and a small compressor, these variables become particularly important. Rather than expecting the paint to perform perfectly under every circumstance, I approached the first coat as an opportunity to learn how the combination of paint and equipment behaved.
3. Working with a Generic Chinese-Made Airbrush
The airbrush used for this stage is a generic model manufactured in China. It is an affordable tool, without the precision, consistency, or refined controls associated with many premium airbrushes.
Operating this type of equipment can be challenging. The trigger may not respond as smoothly as expected, the paint flow may be inconsistent, and the ability to maintain a fine, uniform spray can vary. Small changes in paint consistency or air pressure may produce noticeable differences in the finish.
These limitations do not automatically make the tool unsuitable for scale modeling. They simply require the modeler to pay closer attention to the process.
Before beginning, it is useful to check that the nozzle is clean, the paint cup is properly fitted, and the airbrush produces a reasonably consistent spray. A brief test on a spare piece of plastic or another suitable surface can reveal problems before they affect the model itself.
The distance between the airbrush and the surface also matters. Holding the tool too far away can allow paint to dry partially before reaching the plastic, producing a rough, dusty finish. Holding it too close or moving too slowly can result in excessive paint accumulation, uneven coverage, or runs.
For this reason, I worked with controlled movements, attempting to maintain a consistent distance and avoid concentrating too much paint in one area. Several light passes are generally safer than attempting to achieve complete coverage in a single heavy application.
The goal was not to force inexpensive equipment to behave like a professional airbrush. Instead, it was to understand its limitations and work within them.
That practical experience is valuable in its own right. Scale modeling teaches patience and observation, and learning to control a basic tool can be just as instructive as using a more expensive one.
4. The Challenges of a Tabletop Mini-Compressor
The second important component of my painting setup is a small tabletop mini-compressor. Its compact dimensions make it convenient for a home modeling workspace, especially when space is limited and a large compressor would be impractical.
However, compact compressors can present challenges. Depending on the model, airflow may fluctuate, the available pressure may be limited, and prolonged operation may cause the unit to become warm. Some inexpensive units also provide less control over pressure than a dedicated modeling compressor.
These characteristics can make it difficult to achieve a perfectly consistent spray pattern, particularly when applying paint to large surfaces such as the flight deck of an aircraft carrier.
A stable air supply is important because air pressure influences how the paint leaves the nozzle, how finely it atomizes, and how it settles on the model. If the pressure is too low for the paint and nozzle combination, the airbrush may sputter or produce an uneven spray. If it is too high, the paint may dry too quickly or become more difficult to control.
I had to work with the equipment available, making adjustments where possible and paying attention to how the paint behaved during application.
The compressor is not ideal, and pretending otherwise would not accurately describe the experience. Nevertheless, it performs its basic function and supplies enough air to make airbrushing possible.
For modelers working within a limited budget, this is a familiar compromise. The equipment may demand additional patience, but it can still provide a practical entry point into airbrushing and help develop skills that remain useful when better tools eventually become available.
5. Applying the First Coat of Medium Blue
With the surface preparation completed and the equipment ready, I began applying Tamiya XF-18 Medium Blue to the model.
The first coat is an important diagnostic stage. It reveals surface imperfections that may have been difficult to identify on bare plastic, including scratches, small depressions, uneven joints, and areas that require further attention.
Even after extensive sanding and the application of primer, a model’s surface can reveal unexpected details once paint is introduced. Light reflects differently from a painted surface, and subtle defects can become more noticeable as the color settles.
For this reason, I avoided treating the first coat simply as a race toward complete coverage. It was equally important to observe the finish and determine whether the preparation work had produced the desired result.
Airbrushing a 1/700 scale aircraft carrier also requires a slightly different mindset from painting a smaller individual component. The flight deck is a large, relatively flat surface, while the island, platforms, hull fittings, and other structures create areas where paint can accumulate or where the spray may not reach evenly.
A controlled approach helps reduce these problems. Keeping the airbrush moving, applying paint in overlapping passes, and avoiding excessive buildup around raised details all contribute to a more uniform finish.
The objective of this initial session was to establish the first layer without obscuring the model’s details. Fine structures, panel lines, and other surface features must remain visible because they will contribute to the final appearance after additional painting and weathering.
The first coat also provided an opportunity to assess the practical combination of Tamiya paint, the generic airbrush, and the tabletop compressor. The resulting finish would help guide any adjustments needed for later sessions.
6. Paint Consistency and Airbrush Control
One of the most important lessons in airbrushing is that the paint must be suitable for the equipment being used. Even a good paint can produce unsatisfactory results if it is too thick, too thin, or incompatible with the chosen thinning method.
Tamiya XF paints are commonly airbrushed after being thinned to an appropriate consistency. The correct ratio depends on the paint, thinner, nozzle, air pressure, and desired coverage. There is no single ratio that works perfectly for every setup.
For this project, I needed to consider the limitations of my equipment rather than follow a fixed formula without observing the results.
Paint that is too thick may clog the nozzle or produce an irregular spray. Paint that is excessively thin may require many passes to achieve coverage and can run if too much accumulates on the surface.
Cleaning is equally important. Dried paint around the nozzle can disrupt airflow and paint delivery, making an already temperamental airbrush even more difficult to control. Regular cleaning between sessions helps prevent avoidable problems.
Ventilation and appropriate protection are also essential when airbrushing. Although Tamiya XF paints are commonly described as acrylic paints, their solvent composition and the products used to thin them matter. I work with the understanding that spraying paint can generate airborne droplets and solvent vapors, so adequate ventilation, suitable respiratory protection, and safe handling practices are necessary.
A simple setup can be effective, but safety and preparation should never be sacrificed to save time.
7. Building the USS Enterprise One Stage at a Time
The USS Enterprise deserves careful treatment because its historical significance extends far beyond its impressive dimensions. The Yorktown-class carrier participated in numerous major operations during the Pacific War and became one of the best-known ships in American naval history.
Representing the ship in 1/700 scale means balancing historical detail with the practical limitations of miniature construction. Features that appear relatively simple on a full-size vessel become extremely delicate at this scale, and the paint finish can strongly influence how they are perceived.
The Meng Model PS-005 kit provides the foundation for this project, but assembly alone cannot determine the final result. Surface preparation, paint selection, airbrushing, detailing, and weathering must work together.
My plan also includes displaying the carrier on a textured acrylic ocean base and incorporating additional 1/700 scale aircraft. These elements will eventually help establish the appearance of the ship as part of a larger naval scene.
Before reaching that stage, however, the basic paintwork must be completed carefully. The first application of Medium Blue is one step in a longer process, and each subsequent stage will build on the work already accomplished.
There is no need to rush. Taking time to evaluate the surface now can prevent more complicated corrections later, especially when additional colors and delicate details have been applied.
8. Affordable Equipment, Patience, and the Joy of Modeling
This stage of the project also demonstrates an important reality of scale modeling: expensive equipment can make certain tasks easier, but it is not the only path to progress.
My generic Chinese-made airbrush and tabletop mini-compressor are not particularly easy to operate. Their limitations can make consistent paint application challenging, and they require patience, observation, and occasional adjustments.
Nevertheless, both tools work.
For hobbyists who are just beginning to explore airbrushing, or for experienced modelers who prefer to keep their investment under control, an affordable setup can be a reasonable starting point. The key is to understand what the equipment can accomplish, recognize its limitations, and develop techniques that produce the best possible results within those constraints.
This does not mean that inexpensive tools are equivalent to professional equipment. More sophisticated airbrushes and compressors may offer better control, more consistent airflow, and greater convenience. But practical experience can be developed with basic tools, and that experience becomes part of the modeler’s skill set.
For me, the satisfaction comes from gradually transforming a collection of plastic parts into a miniature representation of a historic warship. Each improvement, whether achieved through careful sanding, a well-controlled coat of paint, or a small adjustment to the equipment, contributes to that process.
9. Looking Ahead: The Next Stages of the Project
With the first coat of Tamiya XF-18 Medium Blue applied, the USS Enterprise project moves into a new phase. The next steps will involve evaluating the painted surface, correcting any imperfections that remain, and planning the additional colors required to complete the intended finish.
Further painting will need to be coordinated with the ship’s historical camouflage scheme and the details of the Meng kit. Masking, careful color transitions, and the painting of the island, deck markings, and smaller fittings will all require attention.
The aircraft and ocean base will eventually become equally important parts of the finished display. Together, they will help communicate the scale, atmosphere, and operational character of the carrier.
For now, the most important achievement is that the first layer of color has been applied. The model has moved beyond the assembly and preparation stages, and the visual identity of the ship is beginning to emerge.
This is what makes a long modeling project rewarding: not a single dramatic moment, but a sequence of small, deliberate improvements.
The first coat of Medium Blue is only the beginning, but it marks a significant milestone in bringing the Meng Model USS Enterprise (CV-6) to life in 1/700 scale.
Follow the next stages of this build on Internet & Arte as I continue painting, refining, and detailing this miniature representation of one of the most legendary aircraft carriers of the Second World War.
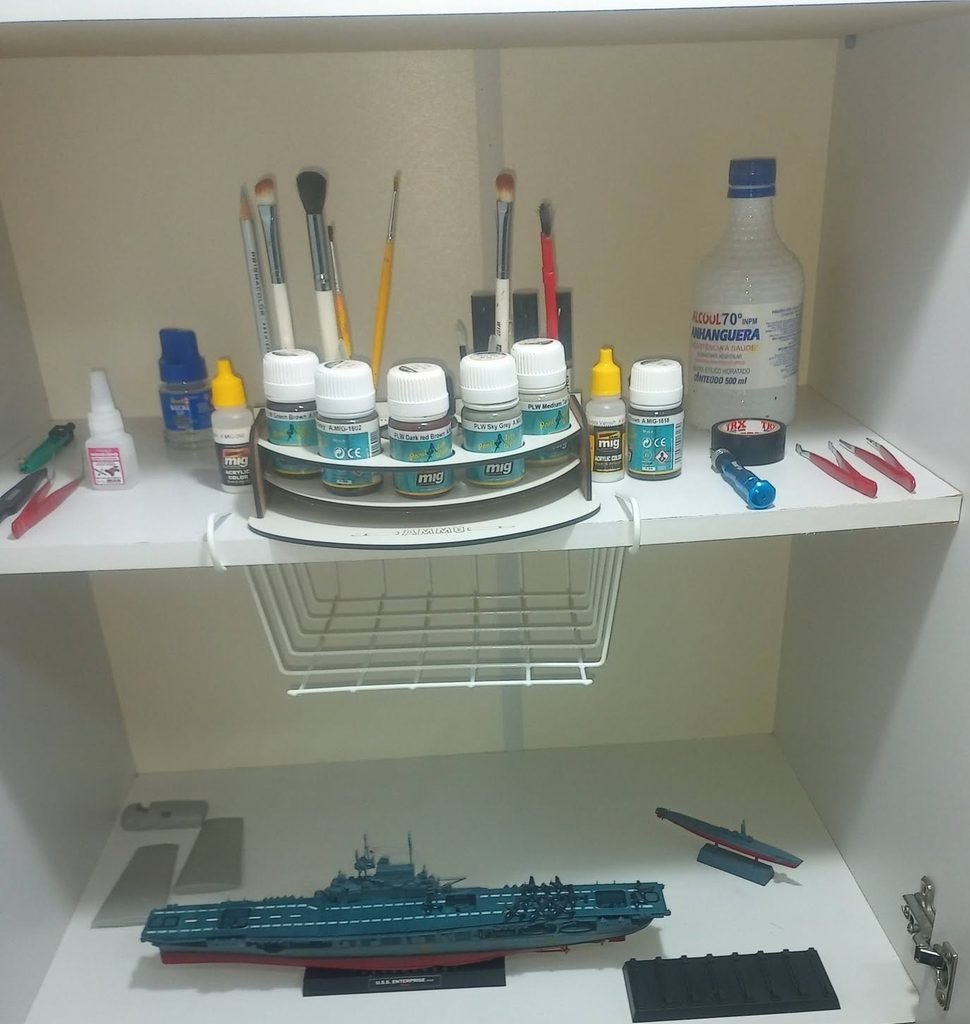
The modeling workbench (Source: Personal archive/Christian O. Schoch)
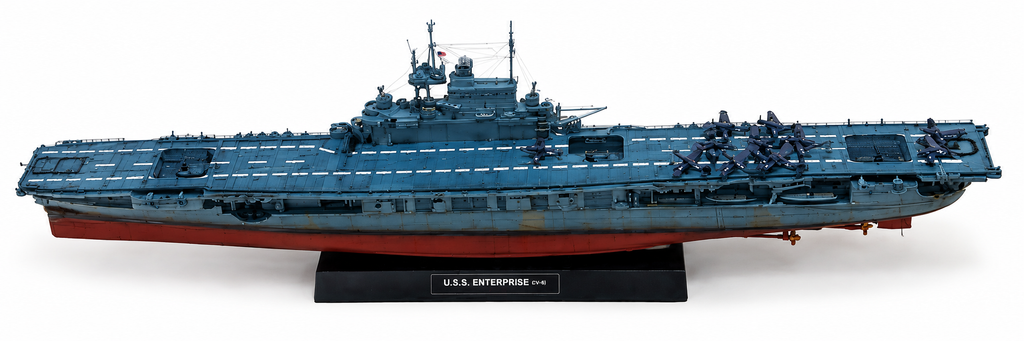
Finished scale model. (Source: Personal archive/Christian O. Schoch)
READ MORE:
- Build Log: USS Enterprise 1945 1/700 Meng – Part 1
- Build Log: USS Enterprise 1945 1/700 Meng – Part 2
- Build Log: USS Enterprise 1945 1/700 Meng – Part 3
- Build Log: USS Enterprise 1945 1/700 Meng – Part 4
- Build Log: USS Enterprise 1945 1/700 Meng – Part 5
- Build Log: USS Enterprise 1945 1/700 Meng – Part 6
- Build Log: USS Enterprise 1945 1/700 Meng – Part 7
- Build Log: USS Enterprise 1945 1/700 Meng – Part 8
- Build Log: USS Enterprise 1945 1/700 Meng – Part 9
- Build Log: USS Enterprise 1945 1/700 Meng – Part 10
- Build Log: USS Enterprise 1945 1/700 Meng – Part 11
- Build Log: USS Enterprise 1945 1/700 Meng – Part 12
- Build Log: USS Enterprise 1945 1/700 Meng – Part 13
- Build Log: USS Enterprise 1945 1/700 Meng – Part 14
- Build Log: USS Enterprise 1945 1/700 Meng – Part 15
Thank you to all of my patrons on Patreon for your monthly support of my work. I truly appreciate it.
Patrons receive a printed copy of my book Zero Fighter Historical Society, delivered straight to your home at no additional cost.
*(Please note: this offer is not available in all countries)
Become a patron at www.patreon.com/ZeroSociety
