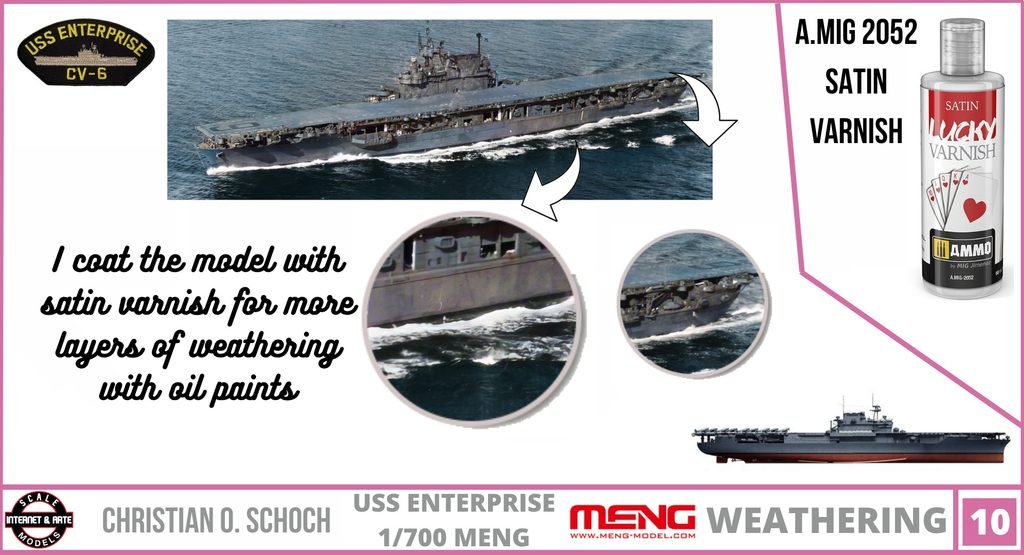
Build Log: USS Enterprise 1945 1/700 Meng – Part 10
Step 10. (Source: Personal archive/Christian O. Schoch)
Introduction: Preparing the Surface for the Next Weathering Stage
Achieving a convincing finish on a scale model warship involves much more than applying the correct colors. The interaction between paint, varnish, decals, and weathering products plays a fundamental role in the final appearance of the model. Each layer has a specific purpose, and understanding how these materials work together can make the difference between an ordinary miniature and a realistic representation of a historic vessel.
In this installment of my USS Enterprise (CV-6) modeling project, I move to another important stage in the finishing process: applying a satin varnish over the model before continuing with additional oil-paint weathering.
The subject is the Meng Model 1/700 scale U.S. Navy aircraft carrier Enterprise, kit PS-005, representing the famous Yorktown-class carrier during the Second World War. The Enterprise is an especially interesting subject for naval modelers because its extensive wartime service offers numerous opportunities to explore the subtle effects of operational wear, environmental exposure, and the accumulation of dirt and discoloration.
After completing the principal paint applications and preparing the surface for the earlier finishing stages, it is time to protect the existing work and establish a suitable surface for the next applications of oil paint.
For this stage, I recommend A.MIG-2052 Satin Varnish. However, for my own model, I used a varnish from a brand that has since been discontinued. Although the product I used is no longer available, the underlying principle remains the same: a suitable satin protective layer can help prepare a painted model for further weathering while preserving the work already completed.
Why Apply Satin Varnish at This Stage?
Varnish is often regarded as the final protective coating of a scale model. In practice, however, it can also be an important intermediate material used throughout the finishing process.
Different weathering techniques benefit from different surface characteristics. A gloss finish, for example, can be particularly useful when applying decals or working with certain washes. A flat finish produces a diffuse appearance that can be appropriate for many military subjects, but its microscopic surface texture may influence how oil paints spread and behave.
A satin finish occupies a useful middle ground between these two extremes.
It provides a surface that is neither completely glossy nor entirely matte. Depending on the formulation and application, this balance can help oil paints flow across the model while retaining enough surface texture to support controlled weathering effects.
On a 1/700 scale aircraft carrier, this consideration is particularly important. The flight deck, island, hull, and other visible structures occupy relatively small areas, and excessive weathering can quickly overwhelm the original paintwork. A controlled finish helps make subsequent effects easier to manage.
Applying satin varnish at this point also creates an opportunity to protect the previous paint layers. Once the varnish has dried and cured according to the manufacturer’s instructions, it can help separate the underlying finish from the oil products applied afterward.
This additional layer is not an absolute requirement for every weathering technique, but it is a useful part of a carefully planned finishing sequence.
My Recommended Product: A.MIG-2052 Satin Varnish
For modelers looking for a suitable product for this stage, I recommend A.MIG-2052 Satin Varnish from AMMO by Mig Jimenez.
The reason for recommending a dedicated satin varnish is straightforward: it provides an intermediate sheen that can be useful when preparing a model for additional finishing work. Rather than leaving the surface extremely glossy or completely flat, the satin effect offers a balanced appearance that works well within a multistage painting process.
It is important to distinguish between my recommendation and the material actually used on this particular model. I applied a satin varnish manufactured by a brand that has since been discontinued. I am therefore not claiming that A.MIG-2052 was the product used in the photographs or in this specific stage of my build.
Instead, A.MIG-2052 is my recommended alternative for modelers who want to reproduce a similar step using an identifiable product.
Before purchasing or applying any varnish, check the current product information, compatibility with your paint system, and the manufacturer’s instructions. Formulations and product availability can change, so it is always advisable to confirm that the specific product is appropriate for the materials already present on your model.
A good varnish should integrate into your existing workflow rather than introduce an unnecessary risk to the finish.
Applying the Satin Coat to the USS Enterprise
When applying varnish to a detailed naval model, preparation and restraint are more important than speed.
The first step is to ensure that the underlying paint is sufficiently dry. A varnish should not be applied over paint that remains soft or unstable, because the additional layer may interfere with the finish or complicate later weathering.
The model should also be free of loose dust, fibers, and other particles. Even a small contaminant can become noticeable when it is trapped beneath a transparent coating.
Once the surface is ready, the satin varnish can be applied according to the manufacturer’s recommendations. The objective is to establish an even protective layer without flooding the fine details.
This is particularly important for a 1/700 scale aircraft carrier. Small railings, delicate structural features, deck fittings, and other details can easily lose their visual definition if too much material accumulates on them.
If using an airbrush, several light applications may provide better control than one heavy coat, provided that the particular varnish is designed for airbrush use and is prepared as directed. Appropriate ventilation and the safety precautions specified by the manufacturer are also essential.
The goal is not to create a thick, visibly reflective shell over the model. Instead, the varnish should form a consistent surface that preserves the existing paintwork and prepares the miniature for the next stage.
After application, the model must be left undisturbed for the recommended drying and curing period. The surface should be sufficiently stable before oil paints or other weathering products are introduced.
Patience at this point is worthwhile. Rushing into the next step can compromise the result of several previous hours of work.
Understanding the Role of Satin in Oil-Paint Weathering
Oil paints are particularly useful for naval weathering because they allow the modeler to introduce subtle variations in tone, localized discoloration, and controlled traces of accumulated dirt.
Unlike some weathering products that dry relatively quickly, oil paints generally offer a longer working period. This makes them suitable for techniques involving small dots of color, thin films, blending, and gradual removal of excess material.
However, their behavior depends partly on the surface underneath them.
A satin varnish can provide a practical balance between the smoothness of a gloss finish and the greater texture of a matte coating. On a suitably prepared surface, this can make it easier to manipulate oil paint without losing control of the effect.
The exact result depends on several factors, including the varnish formulation, the paint’s consistency, the amount applied, the thinner used, and the texture of the underlying surface. Satin varnish should therefore be considered a useful working surface rather than a guarantee of identical results across every product combination.
For the Enterprise, this approach supports a gradual weathering process. The aim is to introduce tonal variation that complements the blue flight deck and the ship’s other painted surfaces without concealing the original colors.
The satin layer also serves as a visual checkpoint. Before moving forward, the modeler can inspect the overall finish and determine whether the previous paint applications remain consistent or require minor corrections.
Weathering a Wartime Aircraft Carrier in 1/700 Scale
A carrier such as the USS Enterprise presents a different set of challenges from a vehicle or aircraft model.
Its large flight deck is a prominent visual feature, while the island, hull sides, platforms, and numerous small structures create contrasting areas of color and texture. A realistic result depends on keeping these elements visually connected.
Weathering should communicate the scale and operational character of the vessel. It should not simply make every surface darker or dirtier.
In 1/700 scale, the effects of full-size weathering must be interpreted carefully. Large streaks, heavy stains, and strong color contrasts can appear exaggerated when reproduced on such a small model. Subtle transitions often produce a more convincing impression of scale.
The satin varnish provides a foundation for this controlled approach. With the surface protected and prepared, additional oil applications can introduce localized changes in tone while allowing the underlying paint scheme to remain visible.
On the flight deck, for example, carefully controlled oil effects can help reduce the uniform appearance of a large painted area. On vertical surfaces, restrained tonal variations can suggest exposure to weather and the accumulation of operational grime.
These effects should remain consistent with the modeler’s historical reference material and the intended period being represented. The objective is to create a believable miniature, not to apply weathering indiscriminately.
Common Mistakes to Avoid
One common mistake is applying too much varnish. An unnecessarily heavy coat may soften fine details, alter the appearance of the paint, or produce an uneven sheen. Applying the product in controlled amounts is generally a safer approach.
Another mistake is continuing before the varnish has dried or cured sufficiently. A surface that feels dry to the touch may not yet be ready for every subsequent product. Following the manufacturer’s recommended waiting period is more reliable than judging readiness by touch alone.
Compatibility is equally important. The interaction between varnish, underlying paint, oil paint, and thinner depends on their respective formulations. Always test unfamiliar combinations on a spare part, painted plastic, or another inconspicuous test surface before applying them to the finished model.
Modelers should also avoid assuming that every satin varnish behaves identically. Differences in formulation can influence the final sheen, application characteristics, and interaction with weathering products.
Finally, remember that varnish is a tool, not a substitute for careful technique. Even the most appropriate product cannot compensate for excessive oil paint, poor surface preparation, or weathering effects that are too strong for the scale.
Conclusion: A Small Step with an Important Purpose
Applying satin varnish is a relatively simple stage in the construction of the Meng Model 1/700 USS Enterprise (CV-6), but it plays a meaningful role in the overall finishing process.
At this point in my project, the purpose of the satin layer is to protect the existing paintwork and prepare the model for additional applications of oil paint. This approach allows the weathering process to continue in a controlled manner while helping preserve the details and colors established during the earlier stages.
For modelers following a similar workflow, I recommend A.MIG-2052 Satin Varnish as a product to consider. My own application, however, was carried out with a varnish from a discontinued brand, so the recommendation should not be confused with the material actually used in this build.
The important lesson is that successful weathering begins before the weathering product touches the model. Surface preparation, compatibility, drying time, and the selection of an appropriate varnish all contribute to the final result.
With the satin coat properly applied and allowed to cure, the Enterprise is ready for the next stage of its transformation. The following oil-paint applications will add further depth, variation, and character to the model, gradually bringing the miniature closer to the appearance of a hardworking U.S. Navy aircraft carrier during the Second World War.
For me, this is one of the most rewarding aspects of scale ship modeling: combining careful preparation, appropriate materials, and restrained artistic judgment to create a miniature that looks convincing without losing the precision of its original construction.
Continue following the project on Internet & Arte for the next stage of the USS Enterprise CV-6 build, where the weathering process continues and the model gradually develops its final appearance.
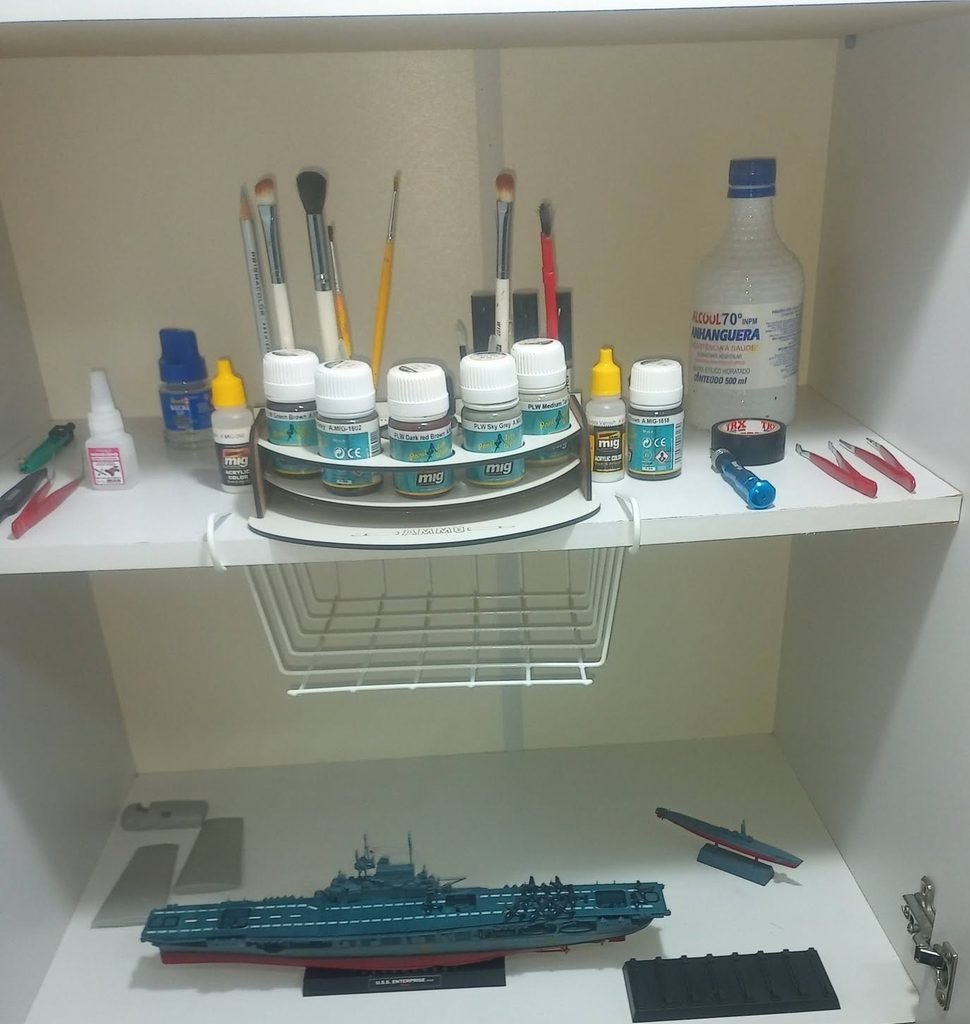
The modeling workbench (Source: Personal archive/Christian O. Schoch)
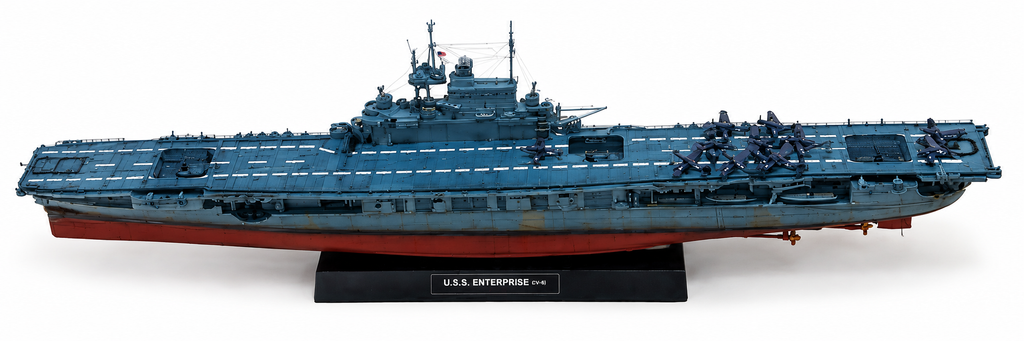
Finished scale model. (Source: Personal archive/Christian O. Schoch)
READ MORE:
- Build Log: USS Enterprise 1945 1/700 Meng – Part 1
- Build Log: USS Enterprise 1945 1/700 Meng – Part 2
- Build Log: USS Enterprise 1945 1/700 Meng – Part 3
- Build Log: USS Enterprise 1945 1/700 Meng – Part 4
- Build Log: USS Enterprise 1945 1/700 Meng – Part 5
- Build Log: USS Enterprise 1945 1/700 Meng – Part 6
- Build Log: USS Enterprise 1945 1/700 Meng – Part 7
- Build Log: USS Enterprise 1945 1/700 Meng – Part 8
- Build Log: USS Enterprise 1945 1/700 Meng – Part 9
- Build Log: USS Enterprise 1945 1/700 Meng – Part 10
- Build Log: USS Enterprise 1945 1/700 Meng – Part 11
- Build Log: USS Enterprise 1945 1/700 Meng – Part 12
- Build Log: USS Enterprise 1945 1/700 Meng – Part 13
- Build Log: USS Enterprise 1945 1/700 Meng – Part 14
- Build Log: USS Enterprise 1945 1/700 Meng – Part 15
Thank you to all of my patrons on Patreon for your monthly support of my work. I truly appreciate it.
Patrons receive a printed copy of my book Zero Fighter Historical Society, delivered straight to your home at no additional cost.
*(Please note: this offer is not available in all countries)
Become a patron at www.patreon.com/ZeroSociety
