Build Log: USS Enterprise 1945 1/700 Meng – Part 7
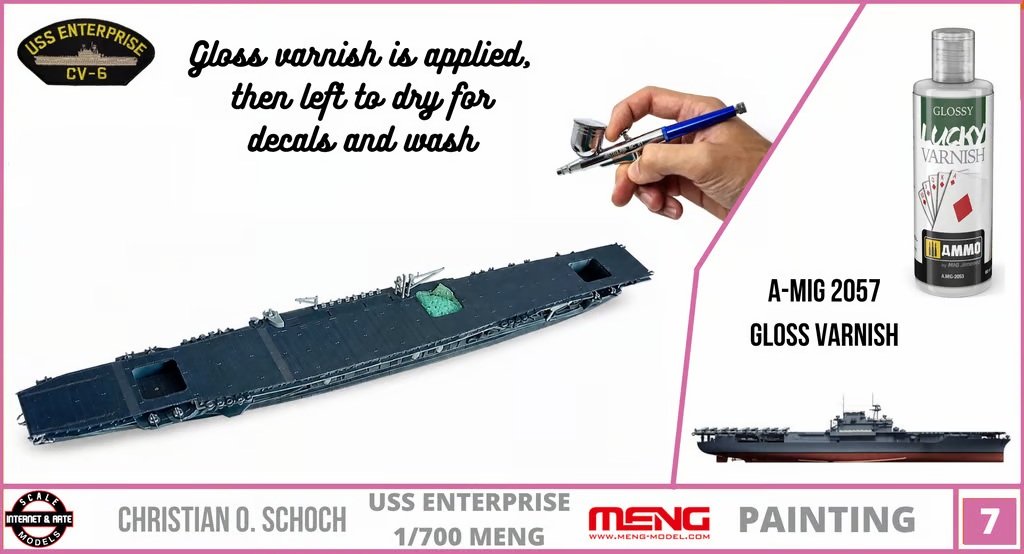
Step 7. (Source: Personal archive/Christian O. Schoch)
1. Preparing the Surface for the Next Stage
In this seventh stage of my Meng Model 1/700 scale USS Enterprise (CV-6) project, the focus shifts from painting to surface preparation. After applying the two shades of blue that define the camouflage scheme of my 1945 aircraft carrier model, it is time to protect the paintwork and prepare the surface for the next important steps: decal application and weathering.
Although gloss varnish may seem like a relatively simple stage in a scale-modeling project, its importance should not be underestimated. A properly prepared surface can make a significant difference in the final appearance of a model, particularly when the next steps involve decals, washes, and the careful enhancement of small details.
My objective at this stage is straightforward. I want to create a smooth, consistent surface that will allow the decals to settle properly and provide suitable conditions for the subsequent wash. Rather than rushing ahead, I prefer to allow the varnish to dry thoroughly before moving forward.
This approach is especially valuable when working in 1/700 scale, where even small imperfections can become noticeable because of the compact dimensions of the finished model.
2. Why Gloss Varnish Is Important
Gloss varnish serves several purposes in scale modeling. One of its principal functions is to provide a smoother surface for the application of waterslide decals. A painted surface, even when it looks relatively smooth to the naked eye, can contain microscopic irregularities that interfere with the way a decal settles against the model.
When a decal is applied over a rough or insufficiently smooth surface, tiny pockets of air may become trapped beneath the carrier film. This phenomenon can produce the familiar silvering effect, in which the transparent areas surrounding the printed markings appear whitish or reflective.
Applying a suitable gloss coat before placing decals helps reduce this risk by creating a more uniform surface. It does not guarantee that silvering will never occur, since decal quality, application technique, and the use of appropriate setting solutions also influence the result. Nevertheless, it is an important preventive measure.
Gloss varnish also prepares the model for the weathering stage. In particular, a smooth surface can help a carefully controlled wash flow along panel lines, around raised details, and into the small recesses that deserve additional definition.
For my Meng Model USS Enterprise, this preparation is particularly relevant because the flight deck, island, hull, and other visible components contain details that need to remain clear and convincing despite the model’s small scale.
3. Choosing a Suitable Gloss Varnish
For modelers looking for a suitable product for this stage, I recommend AMMO by Mig Jimenez A.MIG-2057 Gloss Varnish as an option worth considering for preparing a model before decals and subsequent weathering.
As with any finishing product, it is important to read the manufacturer’s current instructions, including guidance on application, compatibility, and drying time. Different varnishes can behave differently depending on their formulation, the underlying paint, the ambient temperature, and humidity.
For this particular project, however, I did not use the AMMO product. The gloss varnish I actually applied was manufactured by another brand that has since been discontinued.
This distinction is worth mentioning because scale modelers frequently work with products purchased years ago, discontinued materials, or paints and varnishes that are no longer readily available. A model does not necessarily require the newest product on the market to achieve a satisfactory finish. What matters is understanding the material being used, applying it appropriately, and allowing it to dry under suitable conditions.
My recommendation of A.MIG-2057 is intended to give readers a practical alternative to consider rather than suggest that this was the exact product used in the photographs documenting this stage.
4. Applying the Gloss Coat
Before applying varnish, I made sure that the painted surfaces were ready to receive the next layer. The blue camouflage colors had already been applied, and the objective now was to protect and prepare those finishes without unnecessarily disturbing the work completed in the previous stages.
When applying gloss varnish to a model of this size, I find it useful to work methodically and pay attention to coverage. The intention is to achieve a consistent finish rather than build up an unnecessarily thick layer.
Excessive application can obscure delicate details, accumulate around raised features, or produce an uneven appearance. These concerns are particularly important with a 1/700 scale aircraft carrier, where small deck features, structural elements, and other fine details contribute significantly to the overall impression.
An airbrush can be a convenient tool for applying varnish because it allows the modeler to distribute the product across relatively large surfaces while maintaining control over the application. However, the choice of tool depends on the varnish being used and the manufacturer’s recommendations. A suitable brush may also be appropriate for certain products or smaller areas.
The important point is to apply the varnish in a controlled manner, avoiding excessive buildup and ensuring that the surfaces intended for decals receive adequate coverage.
For the flight deck and other broad surfaces of the Enterprise, consistency is more important than speed. A careful application helps establish the foundation for the finishing work that follows.
5. Patience During the Drying Process
Once the gloss varnish had been applied, I allowed it to dry before proceeding to the next stage.
This waiting period is an essential part of the process. A varnish layer may appear dry on the surface before it has fully cured or reached the condition recommended by its manufacturer. Handling the model or applying decals too soon can compromise the finish, leave fingerprints, or cause the next materials to behave unpredictably.
Drying time depends on several factors, including the specific product, the thickness of the application, temperature, and humidity. For this reason, I prefer to follow the manufacturer’s guidance instead of relying on a fixed drying period that may not be appropriate for every varnish.
It is also important to keep the model in a clean, protected environment while the coating dries. Dust settling on a fresh gloss surface can become an unwanted imperfection that is difficult to remove without additional work.
For a project that involves numerous small details, patience at this stage can prevent unnecessary corrections later. There is little advantage in saving a few minutes if doing so risks damaging the paintwork or creating problems during decal application.
Once the varnish has dried sufficiently according to the product instructions, the model can be prepared for the next phase.
6. Getting Ready for Decals
With the gloss coat dry, the USS Enterprise is ready to move toward decal application.
Decals are important because they introduce markings and visual information that help bring a scale model closer to its historical subject. Depending on the markings supplied with the kit and the chosen historical configuration, they may include identification details, aircraft-related markings, or other small graphic elements.
At 1/700 scale, positioning is especially important. A decal that is slightly misaligned or placed in the wrong location can be more noticeable than expected, particularly when viewed at close range.
Before applying any markings, I recommend checking their placement against the kit instructions and the intended historical configuration. It is also worth inspecting the surface for dust, fingerprints, or other contamination that could interfere with adhesion.
Decal-setting solutions can be useful when appropriate for the decal and varnish system. They help decals conform to the surface and may improve their appearance around fine details. However, compatibility should always be considered, and products should be tested when there is uncertainty about how they will interact with the underlying finish.
The gloss coat provides a useful foundation, but careful positioning and patient handling remain essential to achieving a clean result.
7. Preparing for the Wash
After the decals have been applied and allowed to settle and dry according to the relevant product instructions, the next major stage will be weathering, beginning with the wash.
A wash is a diluted weathering medium used to emphasize recessed details, panel lines, joints, and other features that might otherwise appear too subtle. When applied selectively, it can introduce depth and help distinguish individual elements without requiring dramatic changes to the base colors.
On an aircraft carrier model, the wash must be handled with particular care. The flight deck is a large and visually prominent surface, and excessive contrast can make a small-scale model look exaggerated rather than realistic.
My intention is to enhance the existing detail, not cover the camouflage or transform the model into something that looks heavily weathered without historical justification.
The finish of the varnish can influence how a wash behaves. A smooth gloss surface often encourages the medium to flow along recesses, making it useful for controlled detail enhancement. However, the type of wash, its solvent, and the varnish formulation all matter. Some combinations may damage the finish or produce unwanted staining.
For that reason, testing the complete combination on a spare surface is a sensible precaution, particularly when working with products from different manufacturers.
The wash should be treated as a separate stage rather than an excuse to correct problems created earlier. Proper surface preparation makes the process more predictable and gives the modeler greater control over the final appearance.
8. A Small Step With a Significant Impact
Applying gloss varnish may not be the most visually dramatic moment in the construction of a 1/700 scale aircraft carrier, but it is one of the stages that connects painting with the finer work of finishing.
The blue camouflage provides the visual foundation of my USS Enterprise in its 1945 configuration. The gloss coat now prepares that finish for markings and weathering, helping establish the conditions needed to bring the model’s details into sharper focus.
My experience with this stage reinforces a simple principle: successful scale modeling is not only about selecting the correct colors or assembling parts accurately. It is also about understanding how each layer interacts with the next and allowing sufficient time for every stage to perform its intended function.
For readers following this build, my recommendation is to consider AMMO by Mig Jimenez A.MIG-2057 Gloss Varnish, while remembering that the product I actually used was a discontinued varnish from another manufacturer. Whichever suitable product you choose, careful application and proper drying are more important than rushing to reach the next step.
With the gloss varnish dry, the Enterprise is now prepared to receive its decals and move closer to the weathering stage. The next steps will add further definition and help transform the painted components into a more convincing miniature representation of this historic American aircraft carrier.
The build continues: in the next stage, the focus will move from protecting the paintwork to adding markings and developing the finer visual details that make a scale model come to life.
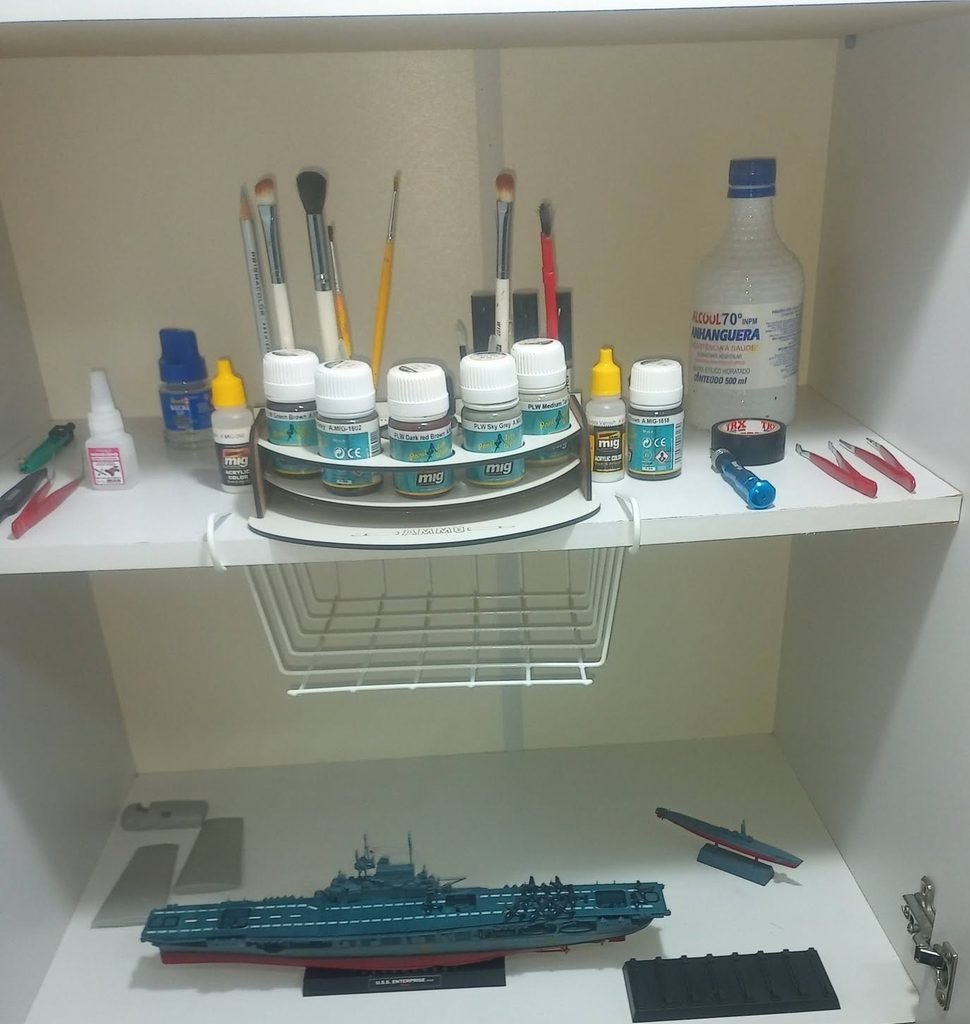
The modeling workbench (Source: Personal archive/Christian O. Schoch)
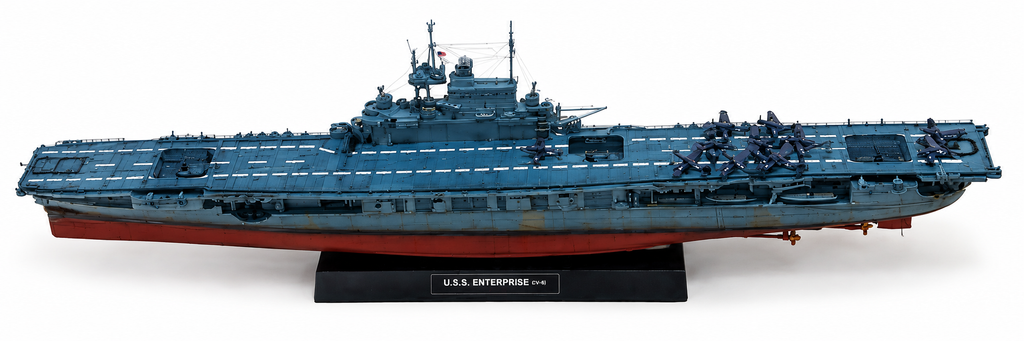
Finished scale model. (Source: Personal archive/Christian O. Schoch)
READ MORE:
- Build Log: USS Enterprise 1945 1/700 Meng – Part 1
- Build Log: USS Enterprise 1945 1/700 Meng – Part 2
- Build Log: USS Enterprise 1945 1/700 Meng – Part 3
- Build Log: USS Enterprise 1945 1/700 Meng – Part 4
- Build Log: USS Enterprise 1945 1/700 Meng – Part 5
- Build Log: USS Enterprise 1945 1/700 Meng – Part 6
- Build Log: USS Enterprise 1945 1/700 Meng – Part 7
- Build Log: USS Enterprise 1945 1/700 Meng – Part 8
- Build Log: USS Enterprise 1945 1/700 Meng – Part 9
- Build Log: USS Enterprise 1945 1/700 Meng – Part 10
- Build Log: USS Enterprise 1945 1/700 Meng – Part 11
- Build Log: USS Enterprise 1945 1/700 Meng – Part 12
- Build Log: USS Enterprise 1945 1/700 Meng – Part 13
- Build Log: USS Enterprise 1945 1/700 Meng – Part 14
- Build Log: USS Enterprise 1945 1/700 Meng – Part 15
Thank you to all of my patrons on Patreon for your monthly support of my work. I truly appreciate it.
Patrons receive a printed copy of my book Zero Fighter Historical Society, delivered straight to your home at no additional cost.
*(Please note: this offer is not available in all countries)
Become a patron at www.patreon.com/ZeroSociety
