Build Log: USS Enterprise 1945 1/700 Meng – Part 14
Step 14. (Source: Personal archive/Christian O. Schoch)
1. Bringing the Model to Its Final Stage
Building a scale model of the USS Enterprise (CV-6) as it appeared in 1945 is a rewarding project that combines historical research, careful assembly, painting, and weathering. At this stage of the build, the major construction and painting work is complete, the flight deck has received its weathering effects, and the ship’s appearance is beginning to reflect the demanding conditions of its wartime service in the Pacific.
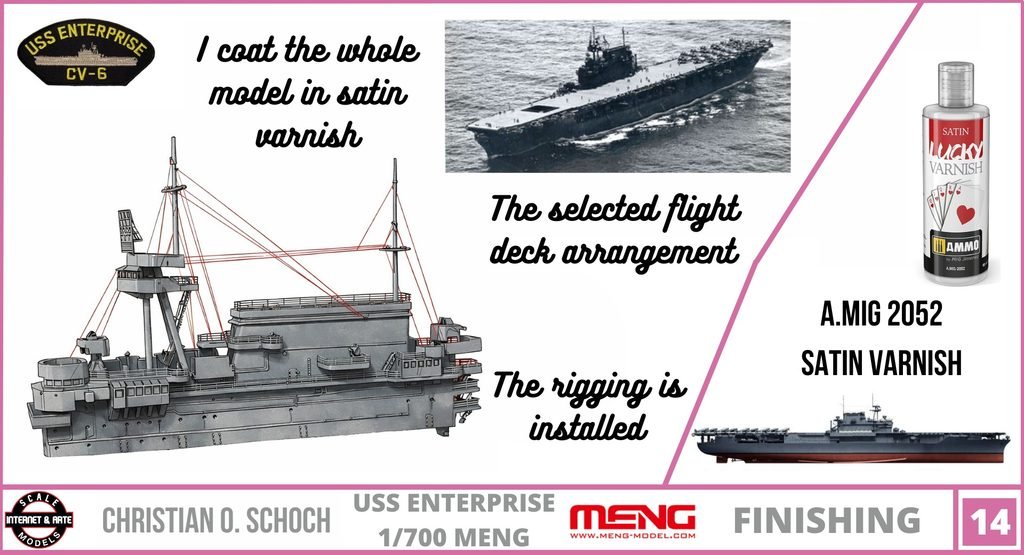
In Slide 14 of this project, I focus on three important finishing operations: applying a final satin varnish over the entire model, installing the ship’s rigging, and attaching the aircraft to the flight deck. Each operation contributes something different to the finished presentation. The varnish helps unify and protect the various painted surfaces, the rigging adds delicate structural details, and the aircraft give the carrier the operational appearance that makes this type of naval model so distinctive.
Although these tasks may appear straightforward, working in 1/700 scale requires patience and a carefully planned sequence. Small components can easily be damaged, fine rigging can be difficult to position, and even a minor amount of excess adhesive can become conspicuous. The goal is to complete the model without losing the subtle details developed during the previous stages.
2. Applying a Final Satin Varnish
The first task is to cover the entire model with a layer of satin varnish. This finishing coat plays an important role in bringing together the different surfaces and effects applied throughout the painting process.
During the previous stages, I worked with several finishes and weathering products to reproduce the appearance of a veteran aircraft carrier. The flight deck, hull, superstructure, and other components do not necessarily respond to light in the same way. Some areas may appear slightly glossier, while others have a more subdued finish because of the paints and weathering materials used.
A carefully applied satin coat helps create a more consistent overall appearance without eliminating the visual character of the individual surfaces. Unlike a high-gloss varnish, satin varnish produces a restrained sheen that is particularly suitable for a large wartime warship. It provides a degree of reflected light while avoiding the excessively shiny appearance that can make a military model look unrealistic.
For the USS Enterprise in its 1945 configuration, this balance is important. The ship operated in the Pacific under intense sunlight, exposed to saltwater, changing weather conditions, aircraft operations, and the constant activity of a busy carrier. A controlled satin finish helps convey the impression of a maintained but heavily used naval vessel.
Preparing the Surface
Before applying the varnish, I inspect the model carefully to identify dust, loose particles, and any remaining imperfections. This inspection is particularly important after oil-based weathering techniques, including the streaking effects used on the hull and flight deck.
The varnish should only be applied when the underlying products have dried sufficiently and are compatible with the selected finishing coat. Oil paints and weathering products may require considerably longer drying times than ordinary model paints. Applying varnish too early can interfere with the finish or trap unwanted residues beneath the protective layer.
I also pay attention to the small details around the island, the flight deck edges, the aircraft elevators, and the numerous fittings distributed across the ship. These areas are easy to overlook, yet they contribute significantly to the final result.
Applying the Satin Coat
The objective is to apply a thin, even layer rather than create a thick film. When using an airbrush, several light passes generally provide better control than one heavy application. The airbrush should move consistently, and the varnish should be applied without allowing it to accumulate around delicate details.
Excessive varnish can soften the appearance of fine surface features, obscure small details, or produce an uneven sheen. Particular care is necessary around the ship’s superstructure and the flight deck markings.
I allow the varnish to dry thoroughly before proceeding. The model may look almost finished at this point, but the next operations require direct contact with the structure and its smallest components. A fully cured surface reduces the risk of fingerprints, accidental marks, and damage during handling.
3. Why the Final Finish Matters
A finishing coat does more than change the appearance of the paint. It also helps protect the completed paintwork from incidental handling during the remaining assembly stages.
The different weathering effects now work together as part of a unified finish. The subtle discoloration on the hull, the variations across the flight deck, and the darker details around selected fittings become components of the same visual composition.
However, it is important to remember that satin varnish is not a substitute for careful weathering. Its purpose is to complement the work already completed, not to conceal mistakes or dramatically alter the colors beneath it.
I prefer a restrained approach because the USS Enterprise should remain recognizable as a real aircraft carrier rather than become an exaggerated display of weathering effects. The objective is historical credibility, with enough tonal variation to make the details visible at this small scale.
Once the varnish has dried, the model is ready for the delicate work of installing the rigging.
4. Installing the Ship’s Rigging in 1/700 Scale
Rigging is one of the most challenging finishing details on a small-scale warship. In a 1/700 model, antenna wires and other fine lines can be extremely difficult to reproduce because their dimensions are so small.
Nevertheless, rigging makes a significant contribution to the appearance of the USS Enterprise. The carrier’s island, masts, and antenna supports formed part of the ship’s communications infrastructure. Adding appropriately positioned fine lines helps connect these structures visually and gives the model a more convincing silhouette.
For a ship depicted in 1945, the rigging should be based on the configuration being represented. Wartime alterations, antenna arrangements, and other equipment changes mean that a photograph or drawing from a different year may not always show the correct details.
I therefore recommend consulting historical photographs and reliable plans whenever possible. At this scale, it is unnecessary to reproduce every individual wire visible in a full-size reference photograph. Instead, the priority is to capture the most prominent lines and their overall arrangement without overcrowding the model.
Choosing the Right Material
Several materials can be used for fine ship rigging, including stretched plastic sprue, fine elastic thread, and specialized modeling rigging products. Each has advantages and disadvantages.
Stretched sprue is inexpensive and can be made exceptionally fine, but it is fragile and may break if handled carelessly. Elastic rigging material is often easier to manage because it can accommodate slight movement without immediately snapping. Specialized fine line can also provide excellent results when selected in an appropriate diameter.
The most important consideration is visual scale. A wire that appears perfectly reasonable on a full-size vessel can look disproportionately thick when reproduced on a 1/700 model. Extremely fine material usually produces a more convincing result, provided it remains manageable during installation.
Working Carefully Around the Island
The island and masts require particular attention because they contain several small projections and supports. Before attaching each line, I consider its starting point, its destination, and the best direction from which to install it.
Working methodically is preferable to attempting to install all the rigging at once. Fine tweezers, a sharp hobby tool, and a suitable adhesive can make the process considerably easier.
Only a minimal quantity of adhesive should be used. Excess glue can form visible blobs around attachment points, immediately drawing attention to details that should remain almost invisible.
If using elastic material, I avoid excessive tension. The objective is to achieve a straight, convincing line without pulling delicate masts or other components out of position.
I also recommend completing the most difficult rigging operations before installing the aircraft. This provides better access to the flight deck and reduces the likelihood of accidentally knocking over the finished miniature aircraft.
5. The Importance of Restraint
One of the central challenges of naval modeling is knowing when to stop adding detail. At 1/700 scale, every additional line, fitting, or attachment point can influence the overall appearance.
Rigging should be visible enough to suggest the complexity of the real vessel, but not so prominent that it becomes the main feature of the model. Fine, clean lines usually look more convincing than thick wires or conspicuous adhesive marks.
Lighting also influences how the finished rigging appears. Under strong illumination, some lines may become more visible than they would be in ordinary viewing conditions. This is another reason to select fine materials and maintain consistent tension.
After completing the rigging, I inspect the model from several angles. This helps reveal crossed lines, loose ends, or areas where the material may have become detached. Correcting these problems now is easier than attempting repairs after the aircraft have been installed.
6. Installing the Aircraft on the Flight Deck
The final major operation in Slide 14 is attaching the aircraft to the flight deck.
An aircraft carrier is more than a ship with a large, flat deck. Its identity comes from the relationship between the vessel and the aircraft it carries. Without its air group, the USS Enterprise would lack one of the most important visual elements of its wartime role.
For this project, the aircraft also help establish the intended 1945 appearance. Their types, arrangement, and markings should reflect the historical period represented by the model as closely as practical.
At 1/700 scale, even small aircraft can be surprisingly difficult to handle. Their wings, landing gear, propellers, and other details are delicate, and excessive pressure can easily damage them.
Planning the Aircraft Arrangement
Before applying adhesive, I determine where each aircraft should be positioned. This is particularly important when several miniature aircraft will occupy the same flight deck.
A carrier deck in wartime could contain aircraft in different operational arrangements, depending on whether the ship was preparing to launch aircraft, recovering returning planes, moving aircraft between areas, or conducting maintenance and servicing operations.
For a static display, the arrangement should look deliberate and balanced. Aircraft positioned at different angles can create a sense of activity, while a more orderly arrangement may suggest preparation for flight operations.
The available space must also be considered. At 1/700 scale, a few millimeters can determine whether an aircraft fits comfortably beside another miniature or creates an unwanted visual obstruction.
I dry-fit the aircraft first, checking the distances between their wings and the surrounding deck fittings. I also consider how the final arrangement will look from above and from the viewing angles normally used to appreciate the completed model.
Attaching the Miniature Aircraft
Once the arrangement has been established, I attach the aircraft individually using a small amount of suitable adhesive. Fine tweezers are particularly helpful for positioning them accurately without touching the painted surfaces unnecessarily.
The adhesive must be appropriate for the materials involved. If the aircraft are resin or 3D-printed components, the bonding method should be suitable for that material and the painted surface beneath it.
I avoid applying too much glue because visible adhesive marks can spoil the appearance of the flight deck. The aircraft should appear to rest naturally on the deck rather than sit in obvious pools of adhesive.
After placing each aircraft, I check its alignment and ensure that it remains stable while the adhesive sets. I also leave sufficient clearance between adjacent models to avoid accidental contact during handling.
The final arrangement should complement the ship rather than overwhelm it. The USS Enterprise remains the central subject, while the aircraft communicate its purpose and operational character.
7. Final Inspection and Presentation
With the satin varnish applied, the rigging installed, and the aircraft secured, the model approaches completion.
I conduct a final inspection under good lighting, examining the hull, flight deck, island, rigging, and aircraft individually. I look for visible adhesive residue, uneven varnish, loose rigging, and aircraft that may have shifted during installation.
Any correction should be made carefully. At this stage, aggressive handling can cause more damage than the original imperfection, so it is better to address only problems that can be corrected safely.
The final inspection is also an opportunity to assess the overall balance of the model. The weathering should remain subtle, the rigging should contribute to the ship’s silhouette, and the aircraft should form a coherent arrangement on the flight deck.
For a project depicting the USS Enterprise in 1945, these finishing details help communicate the appearance of a veteran carrier during the final period of the Second World War.
8. Conclusion: Bringing the USS Enterprise to Life
Slide 14 represents an important milestone in my 1/700 scale USS Enterprise project. Applying a final satin varnish unifies the painted surfaces, the rigging adds delicate structural details, and the aircraft transform the flight deck into the defining feature of an operational aircraft carrier.
Each operation demands a different kind of attention. The varnish requires control and patience, the rigging demands precision, and the aircraft installation requires careful planning and a steady hand.
The most valuable lesson is that the final appearance of a scale model depends not only on the quality of its construction and painting, but also on the care taken during the last stages of assembly.
At this scale, restraint is essential. Fine details should enhance the model without becoming exaggerated, and every finishing operation should contribute to the overall impression of a historically grounded miniature.
With these final elements in place, the USS Enterprise begins to look less like a collection of assembled and painted components and more like a coherent representation of one of the United States Navy’s most celebrated aircraft carriers during the final year of the war.
For me, this is the satisfaction of scale ship modeling: combining research, craftsmanship, and attention to detail to bring a historic vessel back to life in miniature.
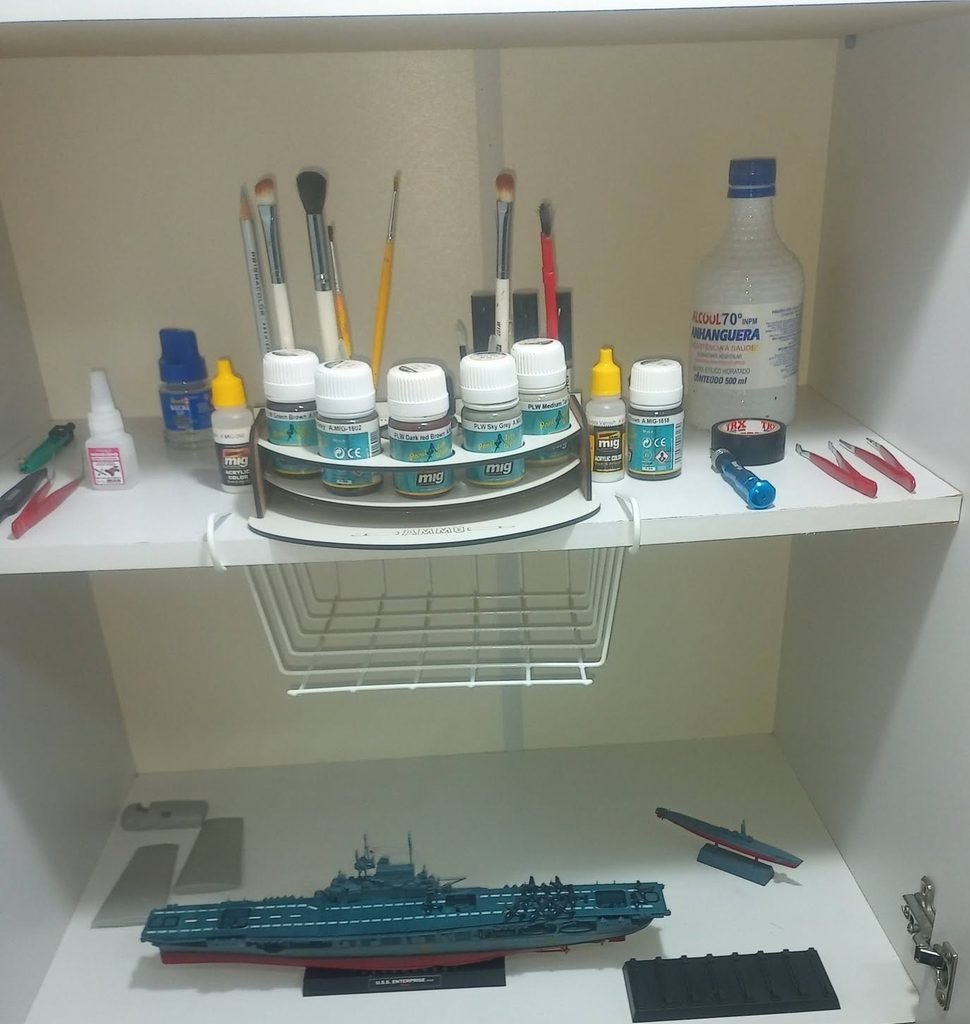
The modeling workbench (Source: Personal archive/Christian O. Schoch)
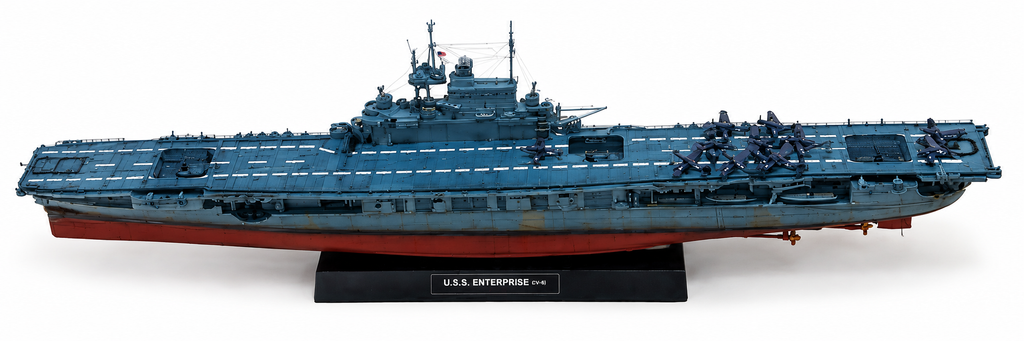
Finished scale model. (Source: Personal archive/Christian O. Schoch)
READ MORE:
- Build Log: USS Enterprise 1945 1/700 Meng – Part 1
- Build Log: USS Enterprise 1945 1/700 Meng – Part 2
- Build Log: USS Enterprise 1945 1/700 Meng – Part 3
- Build Log: USS Enterprise 1945 1/700 Meng – Part 4
- Build Log: USS Enterprise 1945 1/700 Meng – Part 5
- Build Log: USS Enterprise 1945 1/700 Meng – Part 6
- Build Log: USS Enterprise 1945 1/700 Meng – Part 7
- Build Log: USS Enterprise 1945 1/700 Meng – Part 8
- Build Log: USS Enterprise 1945 1/700 Meng – Part 9
- Build Log: USS Enterprise 1945 1/700 Meng – Part 10
- Build Log: USS Enterprise 1945 1/700 Meng – Part 11
- Build Log: USS Enterprise 1945 1/700 Meng – Part 12
- Build Log: USS Enterprise 1945 1/700 Meng – Part 13
- Build Log: USS Enterprise 1945 1/700 Meng – Part 14
- Build Log: USS Enterprise 1945 1/700 Meng – Part 15
Thank you to all of my patrons on Patreon for your monthly support of my work. I truly appreciate it.
Patrons receive a printed copy of my book Zero Fighter Historical Society, delivered straight to your home at no additional cost.
*(Please note: this offer is not available in all countries)
Become a patron at www.patreon.com/ZeroSociety
