Build Log: USS Enterprise 1945 1/700 Meng – Part 11
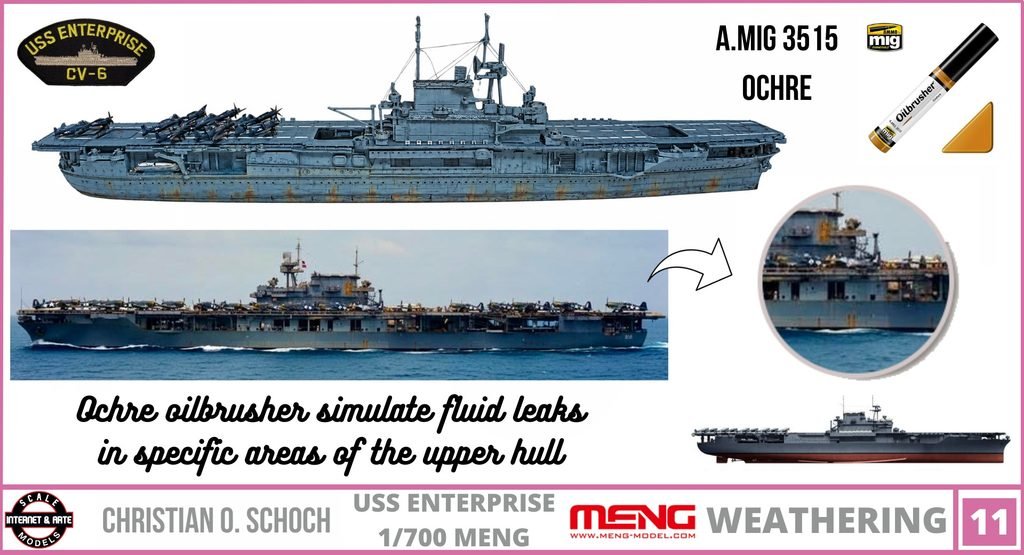
Step 11. (Source: Personal archive/Christian O. Schoch)
Introduction: The Subtle Art of Naval Weathering
One of the most rewarding aspects of building a scale model of a historic warship is the opportunity to recreate the visual character of a vessel that spent months or even years exposed to the demanding conditions of naval operations. Beyond accurate construction and historically appropriate paint colors, it is the careful application of weathering that transforms a model from a miniature representation into a convincing interpretation of a real ship.
In this stage of my 1/700 scale model of the USS Enterprise (CV-6), as she appeared in 1945, I focus on a specific weathering effect: the simulation of fluid leaks and ochre-colored stains on selected areas of the upper hull. For this purpose, I recommend A.MIG-3515 Ochre Oilbrusher, a product from AMMO by Mig Jimenez designed to make the application of oil-based weathering effects more convenient and controlled.
Ochre is particularly useful for introducing subtle variations to a painted surface. Its warm, earthy tone can represent the appearance of accumulated grime, oxidized deposits, and fluid-related discoloration. When applied selectively, it adds depth and visual interest without overwhelming the original paint scheme.
The objective is not to cover the hull with artificial-looking streaks. Instead, I want to suggest the small imperfections and stains that naturally develop on a working warship, using color, transparency, and careful placement to achieve a convincing result.
Understanding Fluid Stains on a Wartime Aircraft Carrier
A large aircraft carrier such as the USS Enterprise was a complex industrial environment. Its upper hull and exposed structural surfaces were subject to weather, seawater spray, maintenance activities, and the movement of personnel and equipment. Various fluids, dirt, and environmental deposits could contribute to localized discoloration.
However, it is important to distinguish between historical plausibility and the precise identification of individual stains. An ochre-colored mark on a scale model should not automatically be interpreted as evidence of a particular type of leak. Rather, it is a modeling technique that can suggest accumulated contamination and the subtle effects of operational service.
For a wartime vessel in 1945, a completely uniform finish would rarely communicate the same visual character as a carefully weathered surface. Differences in exposure, maintenance, and the interaction between painted metal and the marine environment can inspire a more varied finish.
Ochre provides an excellent color for this purpose because it introduces warmth into surfaces otherwise dominated by cool naval blues, grays, and darker structural tones.
The key is restraint. A few carefully positioned stains can communicate the impression of a ship that has been actively maintained and operated at sea. Excessive staining, on the other hand, can make the model look neglected or exaggerated.
Why I Recommend A.MIG-3515 Ochre Oilbrusher
For this stage of the project, my recommended product is A.MIG-3515 Ochre Oilbrusher.
Oil-based weathering products are particularly useful for modelers who want to create subtle transitions, translucent discoloration, and irregular streaks. Their working characteristics allow the color to be manipulated before it fully dries, making it possible to soften edges, reduce intensity, and integrate stains into the surrounding finish.
The Oilbrusher format is also convenient because the product is supplied with an integrated applicator. This makes it easier to place small amounts of color precisely where they are needed, without requiring the preparation associated with a traditional oil-paint palette.
For a model in 1/700 scale, this precision is especially valuable. The upper hull of the Enterprise contains extensive areas of painted surface, but individual weathering marks must remain proportionate to the size of the model.
A tiny streak can represent a much larger discoloration on the full-sized vessel. Consequently, the goal is to suggest the effect rather than reproduce it at its real-world dimensions.
I recommend Ochre Oilbrusher because its warm tone can create a useful contrast against cooler naval colors. It also works well as a component of a broader weathering process, complementing darker washes and other oil-based effects.
The product should not be considered a universal solution for every type of stain. Instead, it is a specialized color that can contribute to a convincing, layered weathering scheme when used thoughtfully.
Preparing the Upper Hull
Before applying the ochre effect, I make sure the existing paintwork is sufficiently dry and that the surface is ready for additional weathering.
This preparation is important because oil-based products are easier to control when applied over a stable finish. The underlying paint should be fully cured according to the manufacturer’s instructions, particularly when using products containing solvents.
A protective varnish can also be useful, depending on the painting system and the desired effect. A suitable surface coating helps separate the weathering layer from the underlying paint and may make later corrections easier.
The choice between a gloss, satin, or matte finish influences how the oil product behaves. A smoother surface generally allows streaks to be manipulated more readily, while a more textured finish may retain pigment and produce a softer, more irregular appearance.
For this particular stage, I want to preserve the work already completed on the USS Enterprise. Previous layers of blue paint, varnish, and weathering should remain visible beneath the new application.
The ochre marks are therefore an additional layer of visual information, not a replacement for the underlying finish.
Applying Ochre to Simulate Fluid Leaks
The first step is to identify specific areas of the upper hull where a subtle stain would contribute to the overall appearance.
Rather than distributing the color uniformly, I concentrate on selected locations. This creates variation and prevents the weathering from looking repetitive.
Using the applicator supplied with A.MIG-3515, I place a small quantity of ochre on the surface. The amount should be limited, especially when working in 1/700 scale. It is much easier to increase the intensity gradually than to remove an excessive application without disturbing the surrounding finish.
I then manipulate the fresh oil color with a clean, suitable brush. Depending on the desired result, the pigment can be drawn into a narrow streak, softened into a translucent stain, or partially blended into the surrounding paint.
For a fluid-leak effect, the direction of the mark matters. Streaks should generally follow a plausible path across the surface, influenced by gravity, the geometry of the structure, and the direction in which a liquid might travel.
On vertical surfaces, downward streaks can suggest fluid movement. On more horizontal areas, irregular deposits or localized discoloration may be more appropriate.
Not every mark needs to have a clearly defined starting point or endpoint. Some stains should be barely visible, while others can have a slightly stronger center with softer edges.
This variation creates a more natural result than applying identical streaks at regular intervals.
Controlling Transparency and Color Intensity
One of the most important aspects of working with ochre is controlling its opacity.
A strong yellow-brown mark may be useful in a small area, but repeated applications of opaque color can quickly dominate the surface. In contrast, a thin, translucent stain allows the original paint to remain visible and produces a more integrated effect.
I prefer to begin with a restrained application and evaluate the result before making further adjustments.
If a streak appears too intense, I use a clean brush and, when appropriate, a compatible thinner recommended by the product manufacturer to soften or redistribute the oil paint. The exact amount of thinner depends on the effect being created and the condition of the underlying surface.
A light touch is essential. Excessive brushing can remove too much pigment, create unwanted marks, or disturb previous weathering layers.
It is also worth allowing the effect to develop gradually. Oil-based products generally remain workable longer than many fast-drying hobby paints, but drying time varies with the formulation, film thickness, environmental conditions, and surface preparation.
Rather than relying on a fixed drying time, I assess the product’s condition and follow the manufacturer’s instructions before applying additional layers.
The final appearance should be subtle enough to preserve the character of the Enterprise’s hull while providing enough contrast to make the weathering visible under normal viewing conditions.
Integrating Ochre with the Existing Weathering
The USS Enterprise project involves more than one weathering color. Earlier stages have introduced other effects, including darker discoloration and cooler tones intended to add depth to the painted surfaces.
Ochre should complement these elements rather than compete with them.
Dark brown and sepia tones are useful for suggesting accumulated grime, recessed dirt, and darker deposits. Blue-based effects can introduce variation into painted surfaces and help prevent a uniform appearance. Ochre contributes a different visual quality, adding a warmer, earthy accent.
When these colors are combined carefully, they create a more convincing range of surface variation.
The order of application is important because each layer influences how the next one appears. If the ochre is applied too heavily over existing weathering, it may conceal the subtle transitions already created. If it is used sparingly, it can enrich the finish without reducing the clarity of the previous work.
I also avoid placing every effect in the same location. A ship’s surface looks more natural when the distribution of stains, shadows, and discoloration is irregular.
For a 1/700 model, these differences must remain controlled. The purpose is to suggest complexity without making the ship visually confusing.
Common Mistakes to Avoid
Several mistakes can reduce the effectiveness of ochre weathering.
Applying too much product at once is perhaps the most common problem. Strong, oversized streaks can look disproportionate and distract from the overall model. Small applications offer greater control.
Creating identical marks can also undermine realism. Repeated stains with the same length, thickness, and intensity tend to look artificial. Varying their shapes and visibility produces a more convincing result.
Ignoring the surface geometry is another issue. Weathering should respond to the structure of the hull rather than appearing randomly distributed. Considering gravity and the orientation of the surface helps establish plausible streaks.
Failing to protect previous work can lead to unnecessary problems. Before using an oil product or compatible thinner, ensure that the underlying paint and varnish are fully cured and resistant to the materials being applied.
Finally, avoid assuming that every stain must be clearly visible. On a small-scale model, subtle effects often communicate realism more effectively than dramatic contrasts.
Conclusion: A Small Detail That Makes a Difference
Applying ochre oil paint to selected areas of the upper hull is a relatively simple technique, but it can make a meaningful contribution to the overall finish of a 1/700 scale model.
For my USS Enterprise (CV-6), representing the ship in 1945, A.MIG-3515 Ochre Oilbrusher is my recommended product for creating warm, localized stains that suggest fluid leaks and accumulated discoloration.
Its greatest advantage is the opportunity to work gradually, adjusting the intensity and shape of each mark until it integrates naturally with the existing paintwork.
The most successful result is not necessarily the most dramatic one. A convincing weathering effect should support the appearance of the ship as a whole, adding character without distracting from its recognizable silhouette, flight deck, and structural details.
By applying ochre selectively, controlling transparency, and allowing the underlying colors to remain visible, modelers can create a finish that feels more nuanced and visually engaging.
This is the essence of effective naval weathering: using small, carefully considered details to suggest the complexity of a much larger object.
On a scale model, realism often emerges through restraint. Every stain, shadow, and tonal variation should have a purpose. When these elements work together, the result is a more convincing miniature interpretation of one of the most famous aircraft carriers of the Second World War.
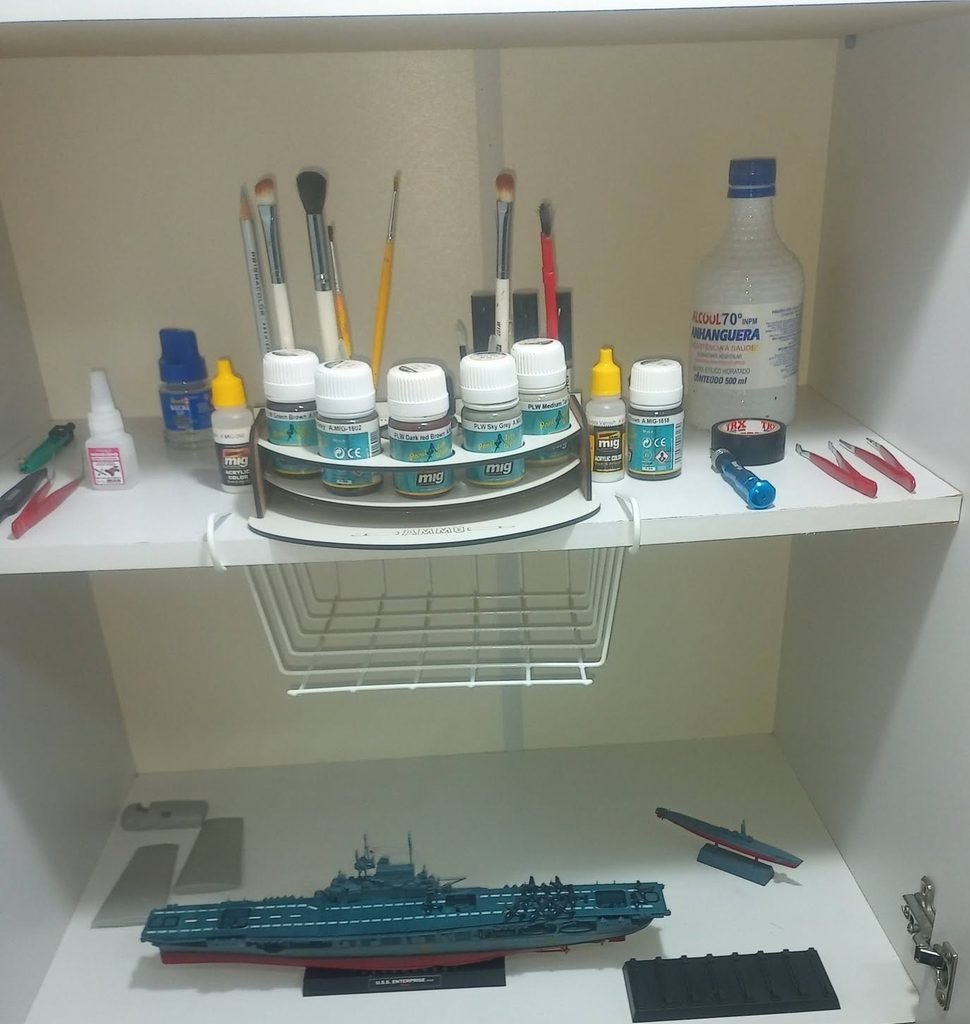
The modeling workbench (Source: Personal archive/Christian O. Schoch)
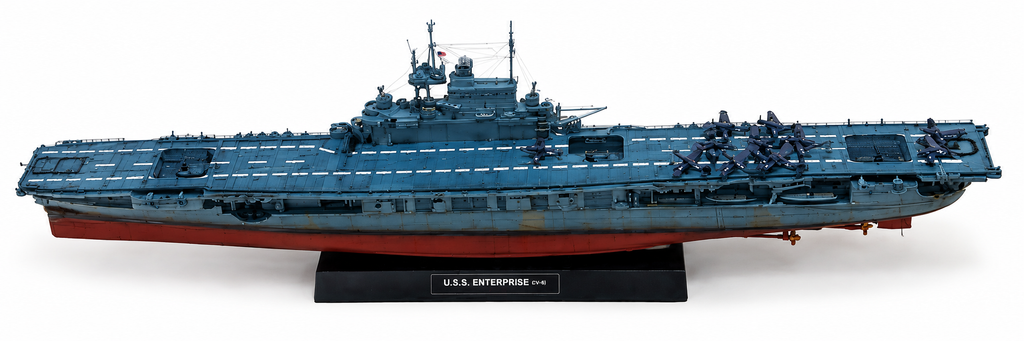
Finished scale model. (Source: Personal archive/Christian O. Schoch)
READ MORE:
- Build Log: USS Enterprise 1945 1/700 Meng – Part 1
- Build Log: USS Enterprise 1945 1/700 Meng – Part 2
- Build Log: USS Enterprise 1945 1/700 Meng – Part 3
- Build Log: USS Enterprise 1945 1/700 Meng – Part 4
- Build Log: USS Enterprise 1945 1/700 Meng – Part 5
- Build Log: USS Enterprise 1945 1/700 Meng – Part 6
- Build Log: USS Enterprise 1945 1/700 Meng – Part 7
- Build Log: USS Enterprise 1945 1/700 Meng – Part 8
- Build Log: USS Enterprise 1945 1/700 Meng – Part 9
- Build Log: USS Enterprise 1945 1/700 Meng – Part 10
- Build Log: USS Enterprise 1945 1/700 Meng – Part 11
- Build Log: USS Enterprise 1945 1/700 Meng – Part 12
- Build Log: USS Enterprise 1945 1/700 Meng – Part 13
- Build Log: USS Enterprise 1945 1/700 Meng – Part 14
- Build Log: USS Enterprise 1945 1/700 Meng – Part 15
Thank you to all of my patrons on Patreon for your monthly support of my work. I truly appreciate it.
Patrons receive a printed copy of my book Zero Fighter Historical Society, delivered straight to your home at no additional cost.
*(Please note: this offer is not available in all countries)
Become a patron at www.patreon.com/ZeroSociety
